
Practical Arduino C
Version 2 IDE
Version 2 of the Arduino IDE
The Arduino desktop IDE (Integrated Development Environment) team have been working on a new version to replace the much loved and regarded original. Version 1 has been getting regular updates but a new modernized interface has been in the making alongside some new functionality.
These notes have been prepared with some of the version 2 release candidates.
You can download the Ide from the Arduino web site and there are versions for Windows, Linux and macOS and all versions are 64 bits. If that represents a problem then the classic version should be around for quite some time and the downloads page should offer 32 bit options.
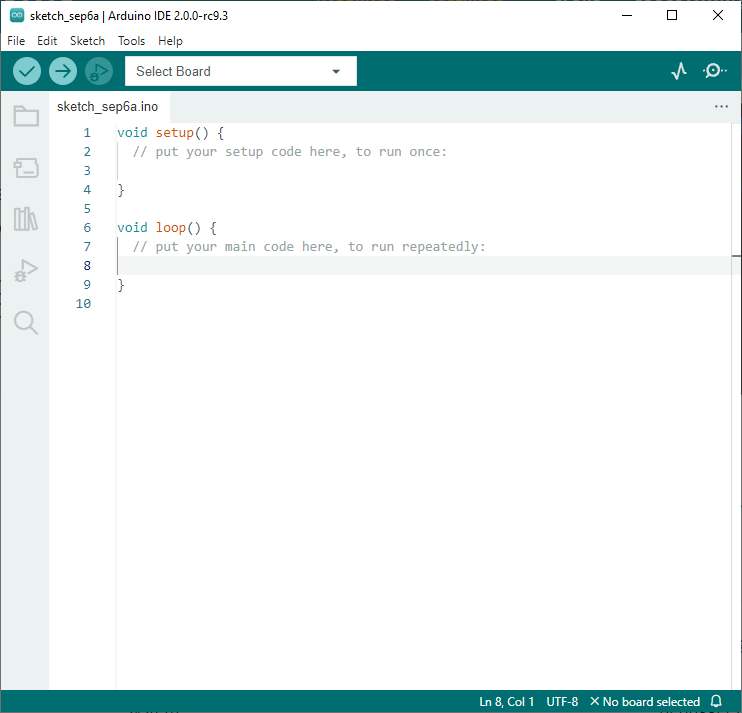
Visually, the new IDE presents a clean user interface with a new sidebar with icons for some of the most frequently used tools. If you explore, you will find a “Settings” option under the “File” menu that allows you to select a preferred theme which is good and you may note a number of features including “Auto Save”.
Notes for Chapter 1
The book “Practical Arduino C” assumes that the reader is a confident computer user and can locate, download and install any required software including third party libraries supporting specific projects. These notes will take a similar line but starting with Chapter 1 “Hello World” we can note any differences between the new IDE and the classic featured in the book.
With an Arduino board plugged into a USB port (I started with a nice basic Uno) and after starting the new IDE we first have to set the board and port. The IDE has a nice prompt in a bar at the top of its window.
 There is also a “Tools” menu option.

I had a little problem with the COM port as the IDE thought there were “NO PORTS DISCOVERED”. AS this was remedied by restarting the IDE I am going to assume that this was a blip in the pre-release software.
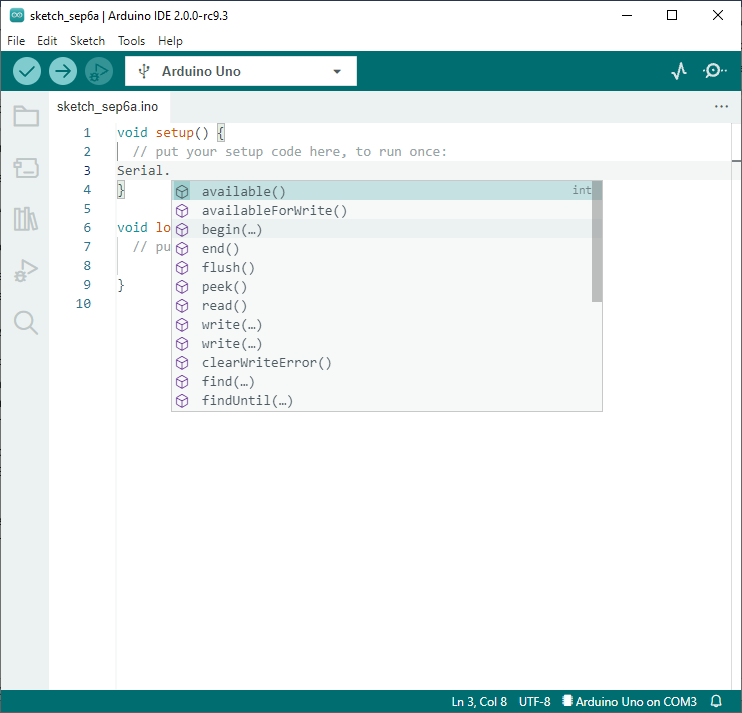
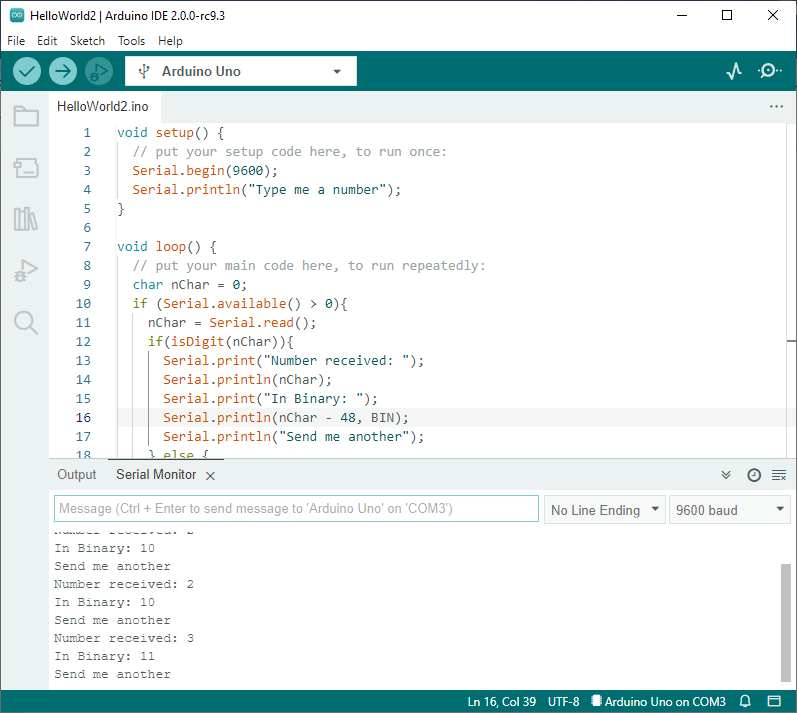
Starting to type the first line of code into the setup() function brought one of the features of the new IDE immediately into play. A new auto-complete facility was offering the .begin() method for the Serial object (among others). That feature made entering our first test program a breeze.
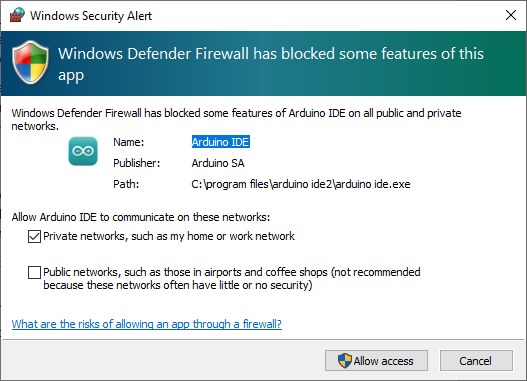
The next step is to start the Serial Monitor using the option under the “Tools” menu or the right-hand icon on the tool bar. That (correctly) triggered a Windows security alert on my Windows 10 PC which required me to allow access. Following that, there is another new feature. The Serial Monitor window is now a part of the main IDE window instead of being a separate “floating” window. The baud rate still needs to be set to match the value set in the Serial.begin() program line. Any apparent hieroglyphics currently showing in the serial Monitor window could be output from the attached Arduino received at the wrong baud rate – not likely to be a problem if you are using a new device though.
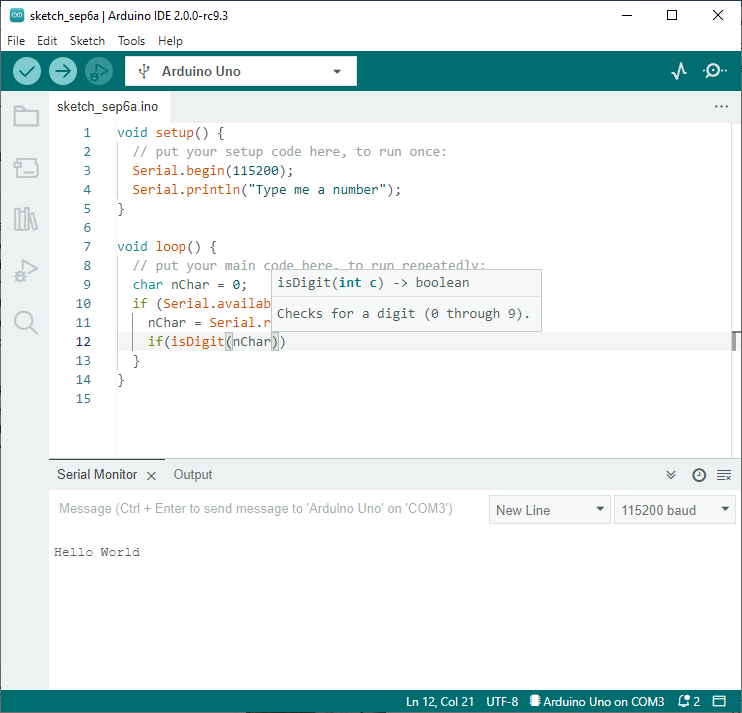
Now to click the Upload button (OK – icon) on the toolbar to see that the “Output” window that details the result of the program compilation and upload is effectively a tab alongside the Serial Monitor in the lower section of the main IDE window. This works OK although you have to click on the Serial Monitor tab to see the glorious words: “Hello World” in full monochrome glory.
When you start entering the second program in Chapter 1 (to demonstrate some interaction with your Arduino) you will notice the auto-complete facility also supports some documentation on key Arduino C functions (in the case illustrated, isDigit()) that again can help you enter valid code.
At the time of writing there is a bug in the IDE version 2 Serial Monitor that turns up in this second C program. A check on the development git-hub pages shows that it had already been known for a while but as there is a simple workaround it may make it to the full release without being fixed. So, you need to apply the workaround. Fortunately, it is very simple.
The bug is that the program appears to get a stream of characters from the Serial Monitor when none are sent. This rather mucks up the demonstration and could be a problem with some other programs you might write.
We need to change the baud rate from 115200 (my preferred rate while writing the book) to 9600, which is something of a default value. [As 9600 seems to act as a default, it probably explains why this issue was missed on initial Serial Monitor testing.]
Change the Serial.begin(115200); to Serial.begin(9600); and change the baud rate selection on the Serial Monitor toolbar to the same, lower, value.
You should also set the drop-down selection (on the Serial Monitor tool bar) which probably says “Newline” to “No Line Ending” for the best results.
To send a number, just type the value into the text box, hold down the
I can confirm that this is a version 2 Serial Monitor bug at the time of writing (may be fixed when you read this) and not an issue with the compiled program running on the Arduino as the compiled and uploaded program works perfectly with the version 1 Serial Monitor.
Note for Chapter 3
If you have seen the baud rate problem then it would be a good idea to stick with the lower baud rate while working through the Chapter 3 example programs as the issue will reoccur for some of them. If there is no input from the Serial Monitor to a given program then go with the book choice.
Notes for Chapter 16
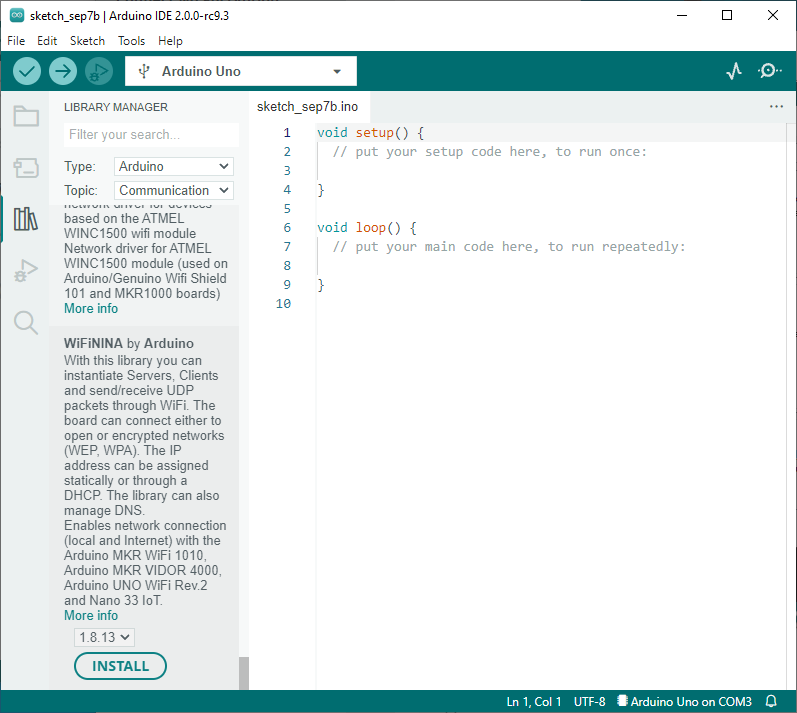
WiFiNINA Library installation
Use the “manage Libraries…” option under the “Tools” menu to locate the WiFiNINA library. You can set filters to help in the search for the code library you need. You can “toggle” the library management window using the library icon on the IDE window sidebar.
After connecting the MKR 1010 for the first time (on a new PC) I was prompted to download and install the SAMD ARM 32-bits support and this was managed by the IDE but did require my confirming the component installations with Windows.
Debugging Support
The new version 2 Arduino IDE features support for debugging running code on an Arduino board. However, this is only available for a selected list of recent boards and almost all require the intervention of some fairly expensive third-party test and development hardware. The only board that currently supports IDE2 debugging “natively” is the Arduino Zero.
I took a look at the specs for the Zero but did not find them very compelling. Continued support for the Uno format with a 32bits processor is a positive but the package is slower and has less memory than the much older Due. Comparisons to the offerings of the Raspberry Pi project hardware continue to make mildly dispiriting reading. The ability to manage some debugging of a running program on the Zero looked interesting but frankly felt a little beyond the scope of this book.
The support page for Chapter 5 shows how you can use Microsoft’s Visual Studio or Visual Studio Code to debug running C or C++ code. Using those tools could help debug the code but, of course, can’t include the inspection of hardware events or values.