Jumpstart Visual Studio Code
This is a scary chapter to write; the one thing one can be sure of is that VS Code will continue to develop and gain new capabilities. A couple of years back, I would not have bothered as anyone with reasonable familiarity with a word processing program such as MS Word or a good email interface would have happily found their way around VS Code. In the meantime, VS Code has become the go-to tool for millions of programmers and now includes support for a wide range of programming languages and platforms. This has resulted in an explosion of options and facilities ready to serve the community of VS Code users.
The message here though is “Don’t Panic”. VS Code is still fundamentally a straightforward tool to use and almost all of the options and extras can safely be ignored until some future you finds a need for something, looks around, and discovers the answer ready and waiting in your old friendly program code editor.
It might give you a boost while working through this book, learning JavaScript building games with HTML and CSS, to learn that VS Code is itself developed using just those tools. VS Code is programmed using JavaScript and this ensures that identical software can be delivered on Windows, Linux, Apple Mac and Chromebook. Each release is packaged up using “Electron” to create native executables for each supported OS.* How cool is that?
When you first start VS Code you will be encouraged to select a colour theme and you can use the Welcome dialogue to browse the options.
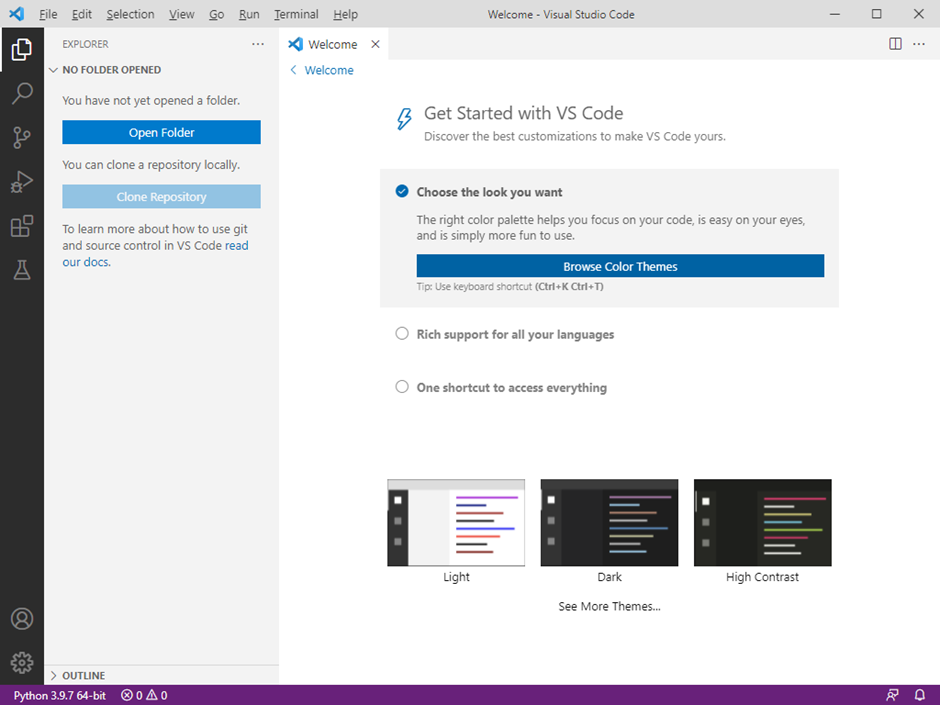
Take a run through them to find one that suits you. I use a light colour theme for images in this book (see above) but when I am working, I generally use the default dark theme.
You can change the colour theme at any time by selecting the option from those that appear when you click the “Settings” icon  .
The “Welcome” dialogue has many other options for you to explore but none of them are pressing or particularly useful at this stage.
.
The “Welcome” dialogue has many other options for you to explore but none of them are pressing or particularly useful at this stage.
Click the settings icon once you are ready for the next step and a long menu will appear.
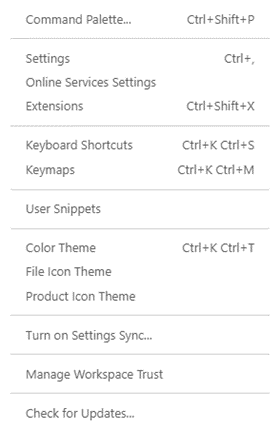
Note the “Color Theme” option in passing and click “Settings”.
This will open a new tab in the right-hand window, once again filled with an exhaustive list. For the moment we are just going to turn something off, so that it does not become a nuisance. Click “Extensions” and then “Git”. Scroll down the right-hand pane until you get to “Enabled”.
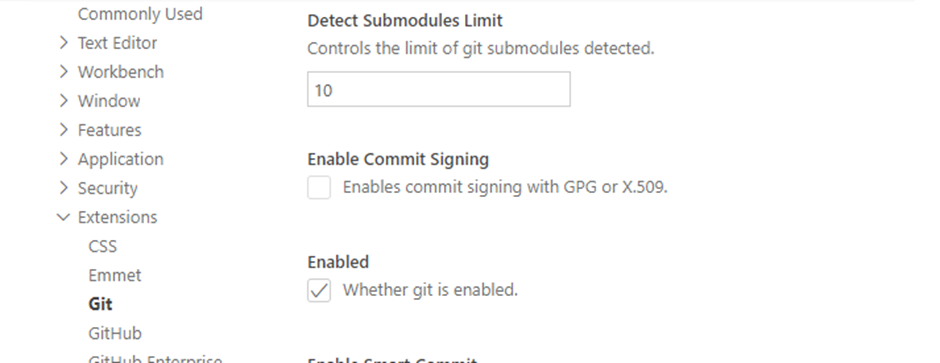
Then click the Checkbox to remove the tick and turn it off. Git is something that you might want to use in the future as it is a “version control system” that can help manage large projects. For the moment you do not need it and can do without any associated error messages.
Close the “Settings” tab and the “Welcome” tab, if you are finished with it. That’s it, for setting things up, now it is worth covering the basics of creating and editing code files.
When you come to work through the game projects in this book you will be encouraged to create a new file folder for each. This keeps each project separated and avoids mix-ups and confusion. It is also the way that VS Code expects you to work. Each project in its own folder.
If you click the files icon  at the top left of the VS Code window you will see that you are being prompted to open a folder.
Why not prepare the ground for your first JavaScript project by creating a new folder called “games” somewhere easy to find on your PC’s local storage. I am assuming that users of Windows, Linux and Mac computers are familiar with using the “File Explorer” or “Files” or “Finder” applets to do just that. It may be though that Chromebook users have not got a lot of experience creating local folders.
On a Chromebook, click the Launcher Button (left hand bottom corner), then the up arrow to reveal the app list. At the top you should see the “Files” button. Click that to open the app. I put new folders on the SD card and you might like to do the same if an SD card slot is available. If not, then there should be more local storage available ready to use under “My Files”.
Now create a test subfolder, maybe called “test”. This subfolder is now the one we will open in VS Code using the offered button or the File menu option “Open Folder” which is how we would normally access our project files. Locate and click the new “test” folder using the dialogue. You will probably then be asked if you trust the content of this folder. If so, it might be a good idea to click the checkbox that trusts any other files and subfolders from your newly created “games” folder. Finally, click the “Yes” option.
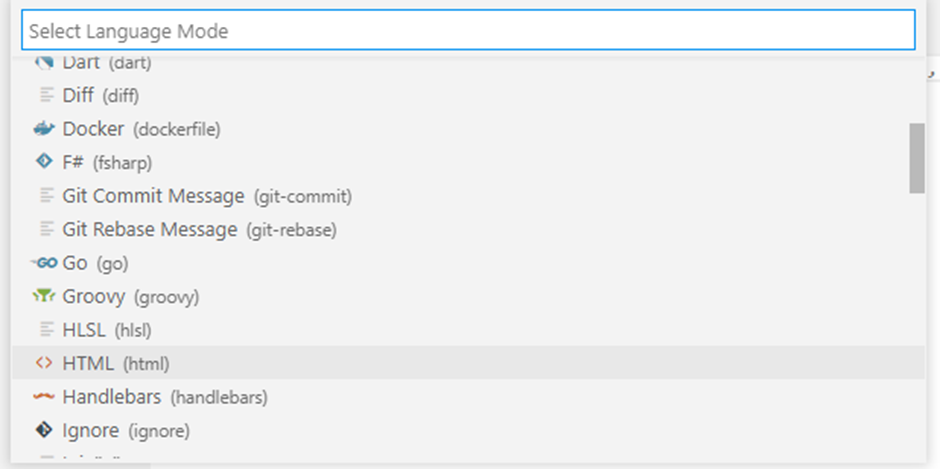
Our JavaScript projects will consist of an HTML file, a CSS file and one or more JavaScript file. This is a good opportunity to try creating one of each in this test folder. As the folder starts empty, you will be offered the “Start” option of creating a new file. You can also use the File menu option “New File”. Go for one of those and you should see a new tab created with the title “untitled-1” with a single line of text that starts “Select a language to get started”. If you click those words (they look a bit like an Internet link) then you will be presented with a nice long list of languages to choose from.
Don’t worry if, in the future, you no longer see that prompt to set a language for a new file – the language can be set easily the first time you save the file content (and there does not even need to be any code when you first use the File Menu “Save” option). Setting the language straight away allows VS Code to provide language specific support for a new code file right from the start.
For the moment, why not select the HTML option as that is usually the start point for our games projects.
Now, VS Code can start helping you to enter HTML.
Next to the number 1 that marks the first line in the new code tab; type in <html>. As soon as you type in the last character (>) VS Code automatically inserts the closing tab </html>. If you hit the “Return” key a few times it will open up some space between that tab pair to insert some more HTML. Now click at the start of the line marked 2 or use the up arrows on your keyboard to get to the same place.
Hit the <tab> key once and then type in the head tag: <head>
You will have noticed that as soon as you enter the opening character of a tag (<), VS Code will offer you a drop-down list of possible HTML tags. When you typed the letter “h” the list of possible tags jumped to the section listing tags starting with that letter.
VS Code will create the closing tag and if you hit the return key again, they will both be indented.

I am sure that you get the idea and can see that we use the tab key to indent tags within their enclosing tags. This helps humans when they read the code.
It would help you to extend your confidence with VS Code if we were to construct and run a very simple test project. To that end, you might like to add some more HTML so that we have a valid document that we can present to a browser. Try editing the HTML content to read:

Now we can save the HTML and move on to the next file type. This is a good opportunity to start using the keyboard shortcut for “Save” which involves holding down the <Ctrl> key and then hitting the <s> key. You can, of course use the File Menu Save option. You will then be shown a standard file save dialogue for your PC type. You will need to change the name of the file (index is a good choice) but retain the .html file extension. The dialogue will already be set to save the new HTML file in your test folder.
We now want to create that CSS file already referenced inside the HTML <head> tag pair. If you have the “Explorer” view open in the VS Code left hand pane (if not then click the  files icon) you have the option of using the “New File” button
  on the mini tool bar
 or you can use the File Menu “New File” option.
If you use the mini toolbar button then you get prompted to type in the full file name for your new file. If so, then enter main.css into the little text box that pops up. This sets the name and the language (based upon the file extension). If you used the File Menu then please select CSS as the language for the new file in the same way as we did for the HTML file.
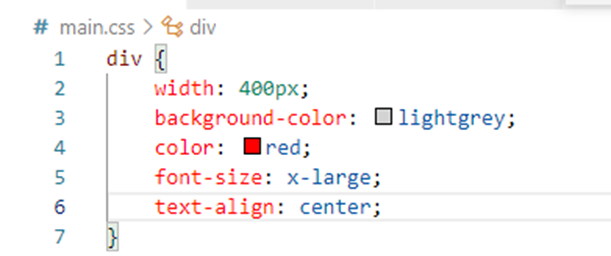
In the new file tab, type div and then a left-hand curly brace {. Then, when VS Code fills in the closing brace, hit the return key to open some space to start entering CSS rules for HTML <div>s. Start with a width rule and watch how the VS Code “IntelliSense” suggests rule names and rule values.

Now fill in the rest of the rules for our CSS as follows:

You will have had lots of help from IntelliSense. I like the way that the selected CSS colours are displayed as a little block alongside the colour name.
Save the file as we did the HTML file, not forgetting to set the name to main.css if you used the File Menu option to create the CSS file.
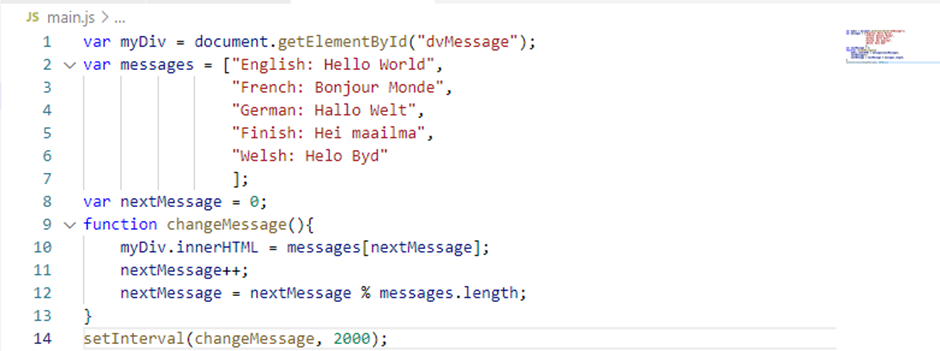
Now go ahead and create a file called main.js to hold our test project JavaScript. You can then enter the following JavaScript code and save the file.
We might as well take this opportunity for some JavaScript revision and to note some new things that we will be using a lot in our games-based projects.
The first line creates a JavaScript variable named myDiv that is connected to the HTML <div> object with the id “dvMessage”. OK that was the only <div> in our HTML but similar code lines can be used to connect to any future project HTML elements.
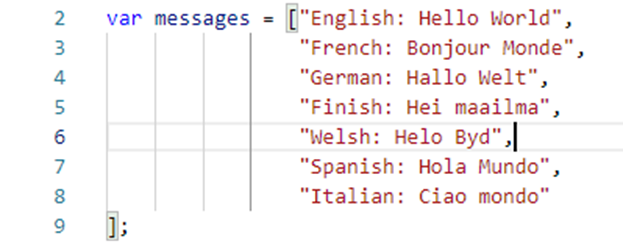
Then the code creates another variable which is an array holding a sequence of strings, each containing a version of “Hello World”. I limited the list to versions that could easily be typed using a standard keyboard but feel free to add different messages if you want. Note that the array definition runs over multiple lines. You may also have noticed that VS Code helped keep the code nicely aligned and readable.
Following the numeric variable nextMessage, which was assigned a value of zero, we had a function declaration. The changeMessage() function sets the content of our HTML div to the value of one of the strings in the messages array. Then the value of nextMessage is incremented by one. However, we only have a limited list of messages (in the case above, just 5) so we want the nextMessage value to return to zero if it now equals 5. Remember that array indexes start at zero and run to one less than the number of elements in the array. We can use the modulus operator to manage that for us. The code uses the length of the array in that last line of the function as part of the expression as you might have added more, or less, messages than 5. It is always good practice to use something like the array length rather than a hard coded value as it makes changes simpler and avoids future bugs.
The final line uses the inbuilt JavaScript timer function setInterval() to call the changeMessage() function every two seconds (2000 milliseconds). We are going to use this function frequently in our games projects.
Important Note: the following book section covers the use of a VS Code extension called JSHint. This extension is now deprecated and should not be installed as part of a new installation.
You might like to consider installing the ESLint extension instead.
The suggested inclusion (below) of deliberate code errors to see how they might be identified and highlighted is well worth the reader's time. An image has been inserted later in this section to show how errors should be detected.
Before we go ahead and run our test project, we might try adding a couple of simple errors to our JavaScript code to see what help we could get from the JSHint extension that this book suggested you added to VS Code when you set up your development software.
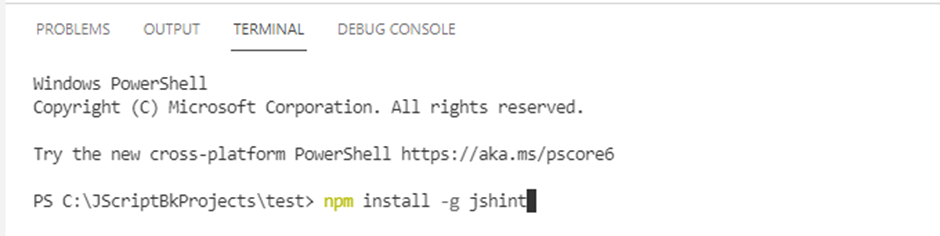
If you did not install the JSHint extension at the start or if you hit a problem installing that extension then now is the time to fix the issue. Click the Terminal Menu and select “New Terminal”. This will appear as a new window (tab) at the bottom of the main code window. You can enter the command “npm install -g jshint” and hit the Return key as shown below. Note that this screen image is from a Windows 10 PC and that therefore the terminal is a Windows PowerShell window. Other PCs and Operating Systems will differ but the functionality will be the same.
That should install this useful extension. If you hit a security problem on Linux or a Mac PC then change the command entered in the terminal window to:
sudo npm install -g jshint
which will execute the command at root level. You might also need to remind yourself of the device administrator’s password depending upon how your PC is set up.
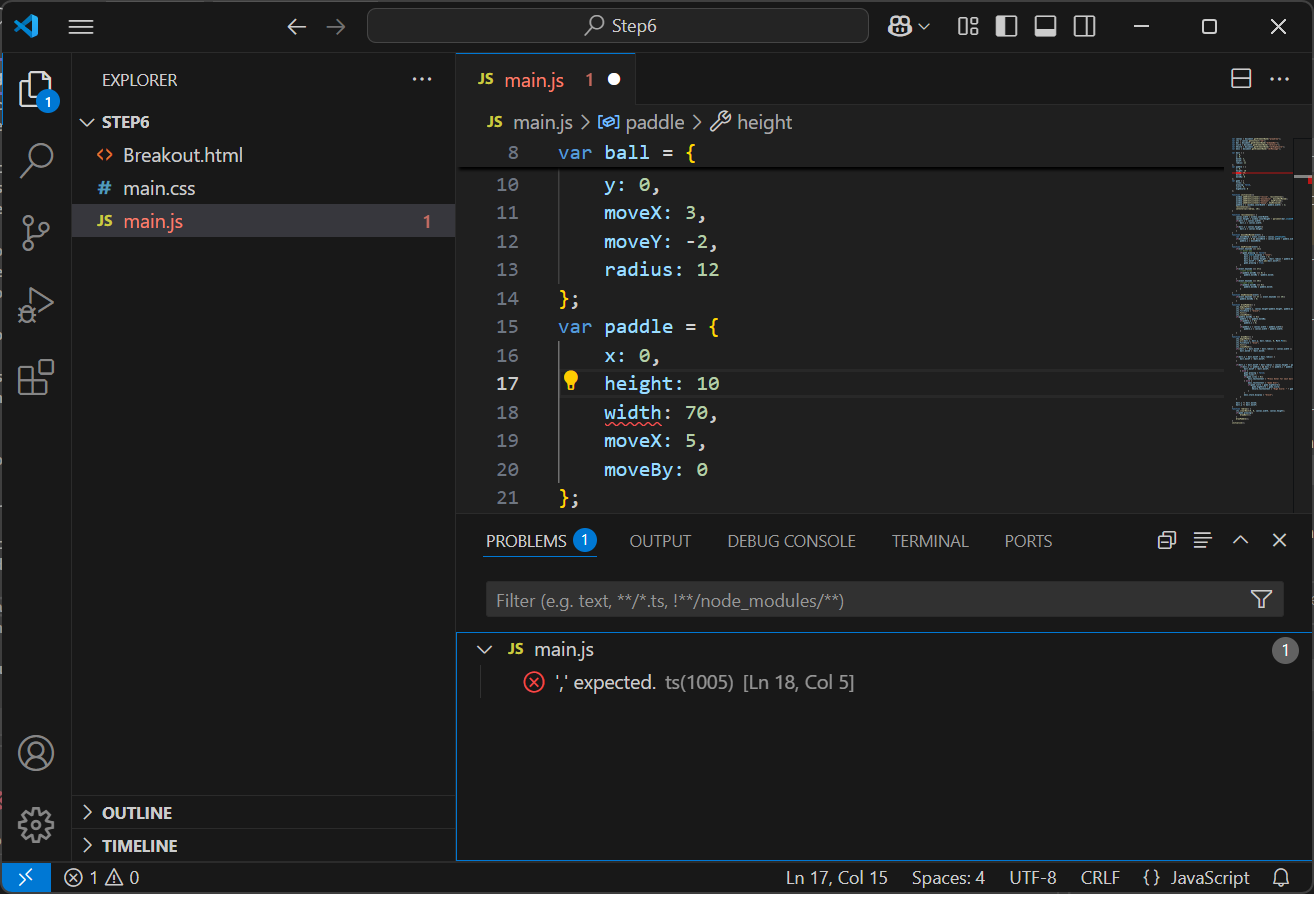
Now we are sure that we have JSHint ready to work for us, we can add a couple of typos to our JavaScript file.
Try deleting the semicolon terminating one of the JavaScript statements and then delete the closing square bracket defining the messages array. JSHint is a software tool known as a “linter”. Instead of picking lint from your clothes it endeavours to pick errors and omissions from your code. Your code might now look something like:
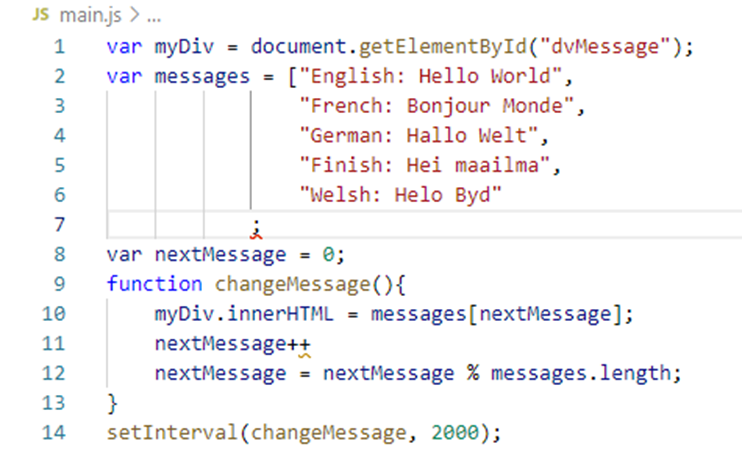
And at the bottom left-hand corner of your VS Code window, you should see an indication of the number of errors detected in your code.

If you hover your mouse over those symbols and numbers you should see that you have introduced 2 errors into your code and that there are also 2 warnings. In fact, there is something of an overlap there as when the array closing bracket was deleted the code at that point became ambiguous. There was more than one possible next character for that location in the code. VS Code will help you locate errors detected by JSHint. This is not a big problem in our small code file but JavaScript files can grow rather large, so any help is appreciated.
Click the error symbols at the bottom left or the “PROBLEMS” tab if it is visible below the main code window and you will see a list of the issues.

If you click on the individual lines in the “PROBLEMS” tab window you will see the associated line in your JavaScript highlighted. You will notice that the first three problems listed are all associated with the same JavaScript line and the missing closing bracket. So, fix that error and the related problem lines will disappear. Just need to replace that missing semicolon and all will be fine again, with zero errors and warnings.
Online version update: please see the image below for how code errors might be displayed.
Now to run our test project. Click on the tab listing the project HTML to make it the current code tab. If you had previously closed that tab then double click the file name in the VS Code explorer window and it will be reopened and become the “current” code tab.
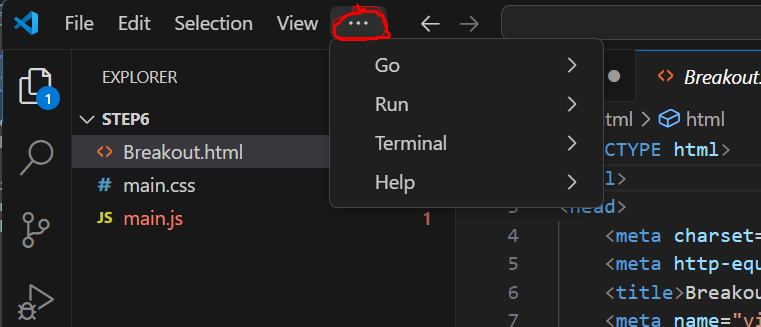
Online version update: if the run menu is not visible towards the top left of the VS Code window then click the elipses to display any hidden menu items.
Next click the Run Menu and click “Start Debugging” from the menu options. It is important that the HTML code tab is the current tab as it is the HTML that is going to be sent to the Browser and that will, in turn, run our JavaScript code. As this is the first time you have run this HTML you will be prompted to select the Browser from a list of those available on your machine. Please select the first Chrome option.
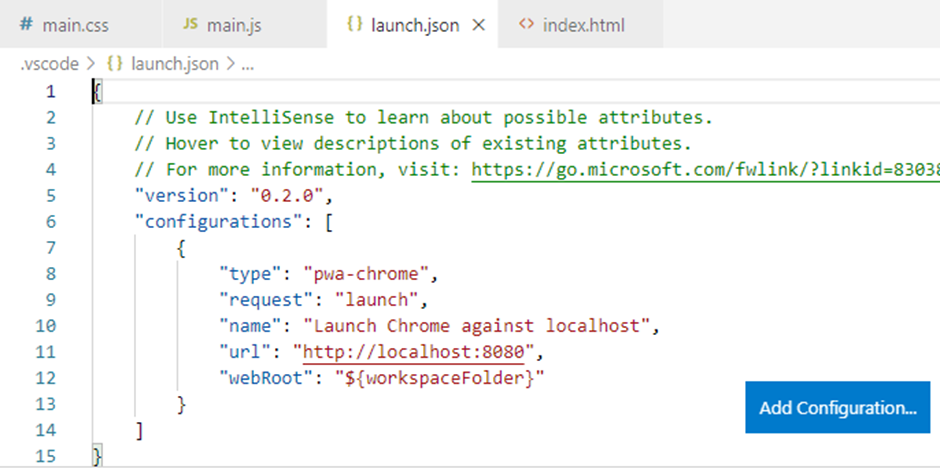
We might as well deal with what happens if you have not made the HTML code tab the current tab when you first used the Run Menu. It is likely to happen at some point in the future so worth covering here. Let us suppose that the JavaScript tab was current. The run process would have started in the same way but VS Code will have generated a file called launch.json for future use when trying to run your JavaScript directly in Chrome without any HTML. I made the error deliberately and this was the result.
Now if you do make the HTML tab the current tab and use the Run Menu to “Start Debugging” the best that will happen is an error message from Chrome. Alternately you might see nothing very helpful at all.
If this happens to you, click the stop button  on the little toolbar that will be visible alongside your project code tabs or just close the Chrome window if one has opened.
To clear this problem, click the VS Code Explorer icon  and then right click the launch.json file name in the Explorer window and select Delete.
You will be asked to confirm the deletion but now you can get back on track by ensuring that the HTML file tab is the current tab and starting again with the Run menu.
A launch.json file would be just the thing for some other types of project coded using VS Code but not suitable for ours.
and then right click the launch.json file name in the Explorer window and select Delete.
You will be asked to confirm the deletion but now you can get back on track by ensuring that the HTML file tab is the current tab and starting again with the Run menu.
A launch.json file would be just the thing for some other types of project coded using VS Code but not suitable for ours.
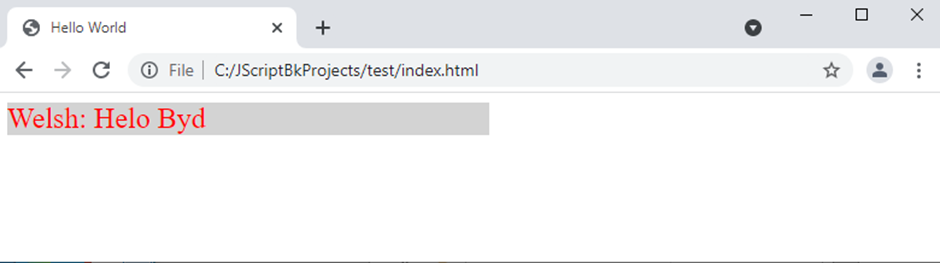
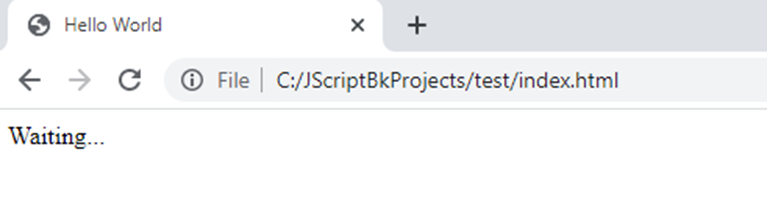
Back with the main stream, a new Chrome window should open and (with a fair wind) you should see the page running through the list of “Hello World” versions. If you don’t see this, then skip to the end of this chapter and the section under “Something went wrong?”.
If you look back at the VS Code window you should see that a little toolbar has opened above the code window.

There will be more on this toolbar in the chapter on debugging but for the moment we can make use of the  reload button and (probably) the
  drag icon.
We are going to make some changes to the running project and view the result of those changes in the open Chrome window.
This is going to be easier for readers with a reasonably wide PC screen but anyone using a small display should be able to switch between windows without too much trouble.
If you can, move the current Chrome window (resized a bit maybe) to one side of your screen and the VS Code window to the other.
drag icon.
We are going to make some changes to the running project and view the result of those changes in the open Chrome window.
This is going to be easier for readers with a reasonably wide PC screen but anyone using a small display should be able to switch between windows without too much trouble.
If you can, move the current Chrome window (resized a bit maybe) to one side of your screen and the VS Code window to the other.
Start by adding a couple of additional language phrases to the messages array in the JavaScript file. This might be where you need to use the drag icon to move the toolbar a little to the right to give you access to the JavaScript tab. Just mouse down on the icon and drag the bar horizontally to a better position.
Now add to the array – perhaps using the suggestions below or make up some of your own. JSHint should help to remind you if you did not add the comma after the previous final entry in the array before adding the first new phrase.
Click the Reload button on the little VS Code toolbar (which will save your changes automatically) and then watch the revised code running live in the Chrome window.
Why not try a couple of changes to the CSS as well. Below, I have added a line to centre the text in the <div>. Perhaps you might like to experiment with some colour changes. Again, clicking the VS Code toolbar reload button will display your changes almost instantly.
This is a fantastic way to iteratively build and modify the user interface (UI) of your projects.
When you have finished experimenting with the CSS, please use the VS Code toolbar stop button to close the active Chrome window and terminate the “Run” session.
You are now pretty well prepared to use VS Code to write HTML, CSS and JavaScript while working through the game projects in this book. Clearly, we have ignored almost all of the vast range of available options and facilities but that is fine. We have acquired some solid experience and a reasonable working knowledge of this key programming tool.
Something went wrong?
This book has a whole chapter on debugging JavaScript, HTML and CSS which covers a lot of ground. Maybe though, we can quickly spot which file is causing issues so that you can recheck your code against the relevant section in this chapter.
A key skill when debugging is analysing the evidence and then focusing on where a bug must be before deciding what the bug might be. This is a skill that develops with time and experience.
We have already covered the possibility that you don’t see a Chrome window or that Chrome just shows an error message. That was all about running the test project from the wrong code tab. The Chrome browser is capable of making a reasonable stab at rendering some pretty mangled HTML so it is unlikely that an HTML error would directly result in a completely failed test run.
What was seen then? If it was something like this:
Then we would be looking for a CSS problem as the page is not correctly formatted. The most likely problem being an error with the line in the HTML file that is supposed to load the CSS file. Take a look at the line in the <head> section that should read:

If you are working on a Linux machine then remember that Linux file names are case sensitive. If you called your CSS file Main.css then that would not be the same file name as main.css.
If that is not the source of the problem then go back and check the CSS itself to ensure that the CSS rule is correctly structured and complete. VS Code should have spotted structural issues there but it is possible that any error messages were not noticed.
If the page displayed correctly but the message did not change then we can focus on the JavaScript. Start though, by checking the HTML line that was supposed to load the JavaScript file - the one at the bottom of the <body> section. It should read:
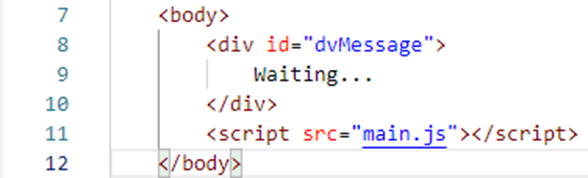
At the same time, check that the <div> id is as shown as well. Including the double quote marks at the beginning and end.
If all looks well there, the issue must stem from an error in the JavaScript itself that was not spotted by JSHint. Try reviewing the code remembering that JavaScript is case sensitive. Is the final line that sets the timer running missing or is the function name changeMessage in that line misspelled? In that latter case, JSHint would have been untroubled because it can’t divine your intentions. VS Code, though, would have marked this as a possible error. Take a look at the ellipsis displayed underneath the first character in that last line shown below where I have incorrectly used an upper-case C.

A mouse cursor hovered over the ellipsis would have resulted in a very helpful pop-up being displayed.

A thorough review of the code files should have sorted out any problems and you should now have a working test project.
VS Code is an impressive programmer’s tool and makes a real effort to help you get things right.
VS Code Find
Once a body of JavaScript has grown as large as some of the games in this book, the task of locating a particular function or finding all the places a particular variable is accessed can be fiddly, time consuming and thus, a little frustrating. VS Code, of course, is ready to help us.
Using VS Code, you will quickly notice that clicking on a variable or function name will result in all instances of that name in your code being highlighted. Instant help.

The VS Code Find facility can go a bit further. You can use the Edit Menu and select the Find option or just hold down the <Ctrl> key and hit the <f> key.
You will find that the keyboard shortcuts like <Ctrl><f> become part of your code editing routine as they are fast and you do not have to search for a menu option, which can be a visual distraction from the task in hand. I am sure that you already use things like <Ctrl><c> to copy a selected section of text along with <Ctrl><x> (cut) and <Ctrl><v> (paste).
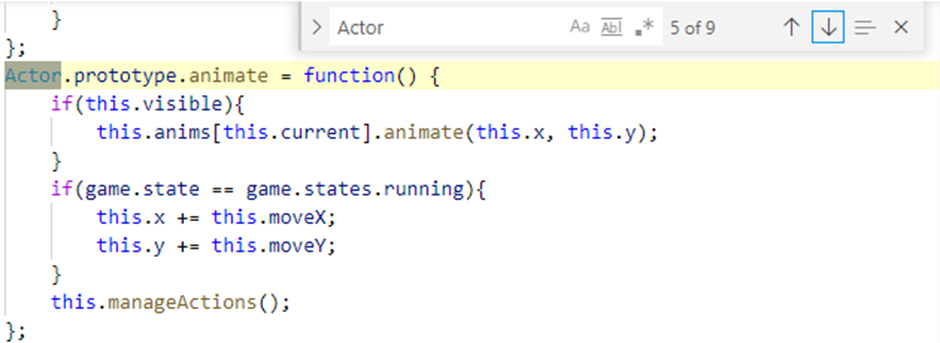
The <Ctrl><f> keyboard shortcut causes VS Code to display a toolbar that includes a textbox with any “current” name or word highlighted, along with some tool icons ready to be explored.

In this instance, VS Code is letting me know that I had previously clicked on the first of 9 uses of the name Actor in my current JavaScript code file.
Clicking the down arrow on the toolbar would scroll the current code tab and highlight the next (and following) use of the same name. The up arrow of course would reverse through the code. The next image shows the fifth place (from the top) where the object variable Actor is used.
Of course, you can delete what is in the toolbar textbox and type in any search term you want. As fast, as you type or delete characters VS Code will keep you updated with the number of times the content of the textbox appears in your code. This can help you quickly hone in on the specific bit of code you are looking for.
The  will close the toolbar but the other non-arrow tools can be toggled on and off, as required. The three tool icons within the textbox can be used to change how the searched for “term” is matched. Hovering your mouse cursor over each gives an indication of how they are used.
The third one shows up as “Use Regular Expression” and frankly the use of regular expressions is beyond the scope of this book but feel free to search for the Mozilla Web Documentation page on the subject, when you are ready to explore that option.
will close the toolbar but the other non-arrow tools can be toggled on and off, as required. The three tool icons within the textbox can be used to change how the searched for “term” is matched. Hovering your mouse cursor over each gives an indication of how they are used.
The third one shows up as “Use Regular Expression” and frankly the use of regular expressions is beyond the scope of this book but feel free to search for the Mozilla Web Documentation page on the subject, when you are ready to explore that option.
The  tool allows you to switch the scope of the search between any selected area of your code and the full code file.
VS Code Format
Code is easier to read and understand (and debug) when it is nicely laid out. Indentation is important as it is used to indicate to a human reader which code lines are associated with a given statement or object.
From time to time, your code might suffer a bit during a lengthy edit. VS Code can come to your rescue though and tidy things up again.
Code like this:
    switch(next[2]){
case dir.up:
            current.up = 0;
            nextCell.down = 0;
             break;
        case dir.down:
                        current.down = 0;
                 nextCell.up = 0;
                    break;
    case dir.left:
            current.left = 0;
                nextCell.right = 0;
            break;
                case dir.right:
                    current.right = 0;
                        nextCell.left = 0;
                    break;
            }
Can be transformed by selecting the code block, right clicking with the mouse and choosing “Format Selection”. The mess above becomes:
            switch (next[2]) {
                case dir.up:
                    current.up = 0;
                    nextCell.down = 0;
                    break;
                case dir.down:
                    current.down = 0;
                    nextCell.up = 0;
                    break;
                case dir.left:
                    current.left = 0;
                    nextCell.right = 0;
                    break;
                case dir.right:
                    current.right = 0;
                    nextCell.left = 0;
                    break;
            }
All nicely tidied and indented with the switch code itself properly placed within the surrounding code. That result delivers code that is way easier to understand.
Just one more thing
JSHint supports JavaScript versions going back in time. This means that it might pick up some of the newer language features we will be using as errors unless we let this extension know that we are programming with up-to-date JavaScript syntax.
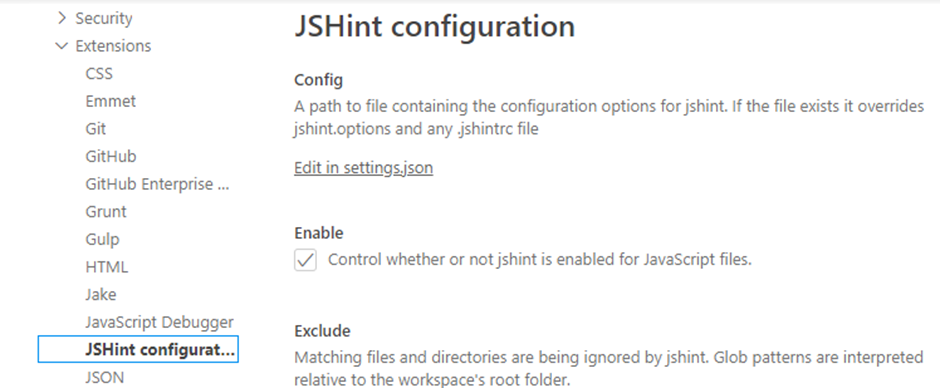
Click the settings icon and the select Settings from the menu. On the Settings tab search through the “Extensions” list for “JSHint Configuration” and click that.
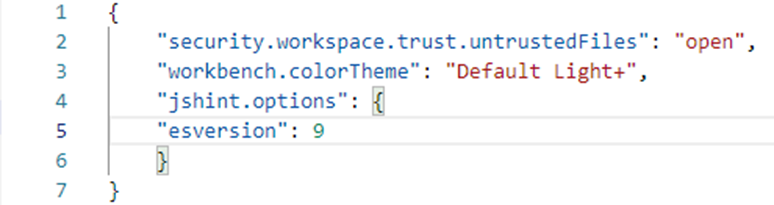
Then click the line that says “Edit in settings.json”. That will open that file in a new tab.
Switch to the settings.json tab and edit the content to include the jshint.options as shown to set the JavaScript version to 9.
* node.js is also used to provide access to OS facilities to support things like file management that are not provided by the Chrome web browser. Key thing is, VS Code is JavaScript all the way down with HTML providing the user interface.
Code downloads for this chapter are available here.