Chapter 9: 2D Platform Games
Our version of the Flappy Bird game was a great introduction to sprites and also added significantly to the JavaScript learning process by extending objects in new ways. We can now take some of that experience to a new “level” if you will excuse the pun and see how we can construct the fundamentals of a 2D platform game.
A new game demands new graphics of course. Fortunately, the Internet is a wonderful source of free and paid for graphics ready to apply in your own games. As you would expect, the graphics used in this section of the book can be downloaded from the book website. Some of the images used are based upon the work of an artist with Hordana as a handle and the originals can be found along with a wealth of free sprite sheets at https://opengameart.org/. Other resources can be found, among a wealth of game and JavaScript links, on the book website.
A minimalist start to a 2D platform project would be a figure taking a stroll as everything else develops from that foundation. I am always keen to start any program with the shortest code file that actually does something. We don’t have to start from scratch as we can borrow some code from the last program, at least to start with.
Create a new game folder (maybe called “Platform”) and create a subfolder for images. Then download the prepared images from the book website and store them in that images subfolder. We then need a new HTML file which, again, is pretty short.
<!DOCTYPE html>
<html>
<head>
   <meta charset="utf-8" />
   <meta http-equiv="X-UA-Compatible">
   <title>Platform</title>
   <meta name="viewport" content="width=device-width, initial-scale=1">
   <link rel="stylesheet" type="text/css" media="screen" href="main.css" />
   <script src="sprites.js"></script>
</head>
<body>
    <div id="dvGame">
        <img src="images/clouds.png" id="imgGame">
        <canvas id="cvGame"></canvas>
    </div>
    <script src="main.js"></script>
</body>
</html>
The <body> contains a single <div> element and that contains an image and a <canvas> element. Now create a CSS file called main.css where we can set how those simple HTML elements should be laid out and displayed.
#dvGame {
    position: absolute;
    width: 800px;
    height: 500px;
    background-image: url("images/gradback.png");
    background-repeat: repeat-x;
}
#imgGame {
    position: absolute;
    top: 0;
    left: 0;
    width: 800px;
    height: 500px;
}
#cvGame {
    position: absolute;
    top: 0;
    left: 0;
    width: 800px;
    height: 500px;
}
The <div> element has a graduated background image set. If you look at the image in the downloaded bundle then you will see that it is only 1 pixel wide which is all that is required as the browser will happily repeat the image across the width of the div. The two HTML elements within the <div> are placed one on top of the other. The <img> element effectively becomes the background to the transparent <canvas> element. This could be handy, as one image can be switched for another at any time – perhaps changing between day and night, indoors or out, as a game progresses.
Then create a new JavaScript file (main.js) also in the game folder. This file starts with some familiar code and parts could be copied from the Flappy Bird game JavaScript. No need to work too hard.
It should start with:
var character;
var canvas = document.getElementById("cvGame");
var ctx = canvas.getContext("2d");
var game = {
    states: Object.freeze({"start": 0, "running":1, "over": 2,"end" : 3}),
    speed: 50,
    state: null,
    tmr: null,
    characterHeight: 75
};
The JavaScript then needs a Sprite object similar to the one from the previous game bird object and an animate() method. Create a second JavaScript file called sprites.js and type the following into that file.
var Sprite = function(imgSrc) {
    this.x = 0;
    this.y = 0;
    this.moveX = 0;
    this.moveY = 0;
    this.img = new Image();
    this.img.src = imgSrc;
    this.rotation = 0;
    this.frames = 1;
    this.frameWidth = 0;
    this.frame = 0;
    this.continuous = false;
    this.visible = false;
};
Then follow that with the animate() method.
Sprite.prototype.animate = function() {
    if(this.visible){
        if(this.frames > 1){
            if(game.state === game.states.start ||
               game.state === game.states.running){
                this.frame += 1;
                this.frame %= this.frames;
            } else {
                this.frame = 0; // stop animation at end
            }
            let clipx = this.frame * this.frameWidth;
            ctx.drawImage(this.img, clipx, 0, this.frameWidth,
       this.img.height, this.x, this.y, this.frameWidth, this.img.height);
        } else {
            ctx.drawImage(this.img, -this.x, this.y);
        }
     }
};
Then write a very short drawFrame() in the main.js file.
function drawFrame() {
    ctx.clearRect(0, 0, canvas.width, canvas.height);
    character.animate();
}
All of the initial action is to be found in the initialise() function – again best in main.js.
function initialise() {
    canvas.width = 800;
    canvas.height = 500;
    character = new Sprite("images/walk11x60x75.png");
    character.visible = true;
    character.frames = 11;
    character.frameWidth = 60;
    character.x = Math.floor(canvas.width / 5);
    character.y = canvas.height - 75;
    game.state = game.states.running; // testing
    game.tmr = setInterval(drawFrame, game.speed);
}
And finally, for the moment, don’t forget to add a call to initialise() right at the bottom of the main.js JavaScript file.
initialise();
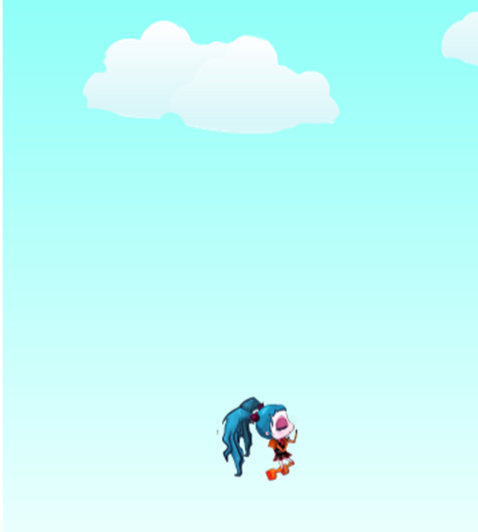
If you fire up the HTML page in the Chrome browser you should see our new character taking an endless stroll against a simple background. Maybe a bit fast paced but a stroll.

Stage 2
In platform games, the main character, at least, has more than one behaviour. Our current Sprite object is great for the more basic game elements that either move in nice steady steps or that have a single sequence of actions. Not wishing to complicate the Sprite object further, it seems sensible to create both a simpler and a more capable sprite object to suite different game requirements.
Concentrating on the JavaScript aspect of this book just for now, we can explore another feature of objects – inheritance.
Many programming languages have features that support classes. A class specification being a template for the creation of objects that contain variables and usually functions (called methods, when they are part of a class) that interact with those variables and code external to the class. The aim of classes it to “encapsulate” all of the code associated with a given object. Each such class might represent a real-world object or a structure that exists only within a program. The key benefit is that when designing a new class the programmer effectively defines an “interface” through which the rest of the code interacts with the class. The internal structure of the class and its methods sit behind that interface.
When a new class instance is created to represent an object then the class constructed uses the template to create a new object with its own set of internal variables. Generally, each instance of a given class shares the same methods with those methods being applied to the specific set of variables owned by that instance.
A feature of almost all class based languages is the ability for new class templates to be defined as inheriting the structure of a previously defined class. You might have a class that represents animals and then subclasses that represent key animal types like mammals or cephalopods. The term subclass can be confusing at first as, in all probability, a subclass has additional content and methods when compared to the “parent” class.
While JavaScript is an object oriented programming language it uses a prototype based approach that is similar to classical classes but also rather different. The most recent version of JavaScript (ECMAScript6) supports the class keyword but classes are built on the pre-existing objects of JavaScript. It is helpful though, to adopt at least some of the techniques of class based programming and we can explore some of those in this chapter.
JavaScript classes themselves will turn up later in this book.
To start, clear the sprites.js file and then start with a new object created using a function. This sort of function is called a constructor. This object has some of the same content as the Sprite object we just deleted.
var Sprig = function(x, y){
    this.x = x;
    this.y = y;
    this.moveX = 0;
    this.moveY = 0;
    this.visible = false;
};
Now we can create a constructor for a new sort of Sprite object.
var Sprite = function(imgSrc, x, y){
    Sprig.call(this, x, y);
    this.img = new Image();
    this.img.src = imgSrc;
    this.continuous = false;
};
The first line of that new Sprite constructing function is the key here. That line effectively imports all of the components of the Sprig object into a Sprite object. The Sprite has inherited variables and their values such as “visible” from the Sprig object. When the Sprig object constructor was invoked using the .call() method then it was passed the value of “this” (along with the x/y position) so that the members created would belong to the new Sprite object.
That revised Sprite does not have any provision for a multi-frame image file. Our next object type is designed to handle just such a component. Add the following to your sprite.js JavaScript file.
var Anim = function(imgSrc, frames, frameWidth, repeat){
    this.img = new Image();
    this.img.src = imgSrc;
    this.frames = frames;
    this.frameWidth = frameWidth;
    this.frame = -1;
    this.default = 0;
    this.repeat = repeat;
};
Now we can create a new object type called Actor, that also inherits from Sprig, and can contain multiple instances of Anim stored in an array.
var Actor = function(){
    Sprig.call(this, x, y);
    this.anims = [];
    this.current = 0;
    this.height = 0;
};
Both the simplified Sprite object and the new Actor objects need methods to animate them. For the Sprite, we can use the much simpler animate() method from the Flappy Bird game.
Sprite.prototype.animate = function() {
    if(this.visible){
        ctx.drawImage(this.img, this.x, this.y);
    }
    if(game.state === game.states.running ||
                      game.state === game.states.over){
        this.x += this.moveX;
        this.y += this.moveY;
        if(this.continuous && this.x < (canvas.width - this.img.width)){
            this.x = 0;
        }
    }
};
That method only draws a complete image but it is going to come in handy for some sprites in this game.
Obviously, the Actor object also needs an animate() method but we have a choice as to where the code to draw a frame from an animation sequence should go. We have choices to make and design choices can have a big impact on the development of a project as it proceeds.
I suggest that we add an animate() method to the Anim object. This version only has to deal with multi-frame images.
Anim.prototype.animate = function(x, y) {
    if(game.state == game.states.running){
        if(this.repeat){
            this.frame++;
            this.frame %= this.frames;
        } else {
            if(this.frame < this.frames -1){
                this.frame++;
            }
        }
    } else {
        this.frame = this.default; // stop animation
    }
    let clipx = this.frame * this.frameWidth;
    ctx.drawImage(this.img, clipx, 0, this.frameWidth, this.img.height,
                                x, y, this.frameWidth, this.img.height);
};
Adding that method to the Anim object dealt with drawing the frame but the Actor object has to deal with movement around the game area. So Actor also needs an animate() method and that one should call the animate() method for the related Anim object.
Actor.prototype.animate = function() {
    if(this.visible){
        this.anims[this.current].animate(this.x, this.y);
    }
    if(game.state == game.states.running){
        this.x += this.moveX;
        this.y += this.moveY;
    }
};
We can test this set of changes by editing the code in the initialise() function to read as follows:
function initialise() {
    canvas.width = 800;
    canvas.height = 500;
    let anim = new Anim("images/walk11x60x75.png", 11, 60, true);
    character = new Actor(Math.floor(canvas.width / 5),
                                             canvas.height - 75);
    character.anims.push(anim);
    game.state = game.states.running; // testing
    game.tmr = setInterval(drawFrame, game.speed);
}
That code creates a new instance of the Anim object using the same image file as we used for the earlier Sprite object. Then a new instance of the Actor object is created and the Anim object added to it.
With those changes in place, a test run should reveal exactly the same scene as before. Even though we are back where this stage started, we now have an improved set of objects going forward.
Stage 3
This stage will see us adding to the “behaviours” of our character and that will mean adding some methods to the character instance. To keep the code from getting mixed up, I advise adding another JavaScript file to the project. Why not name it character.js? It will also need to be referenced in the HTML <head> section just after sprite.js.
Delete the first line in the main.js file that declares a variable called character and then start the new character.js file with a changed character declaration.
var character = new Actor(160, 425);
We can follow that with a function to add some Anim objects to the character
function buildCharacter(){
    character.height = 75;
    let anim = new Anim("images/walk11x60x75.png", 11, 60, true);
    character.anims.push(anim);
    a = new Anim("images/jumpup6x60x75.png", 6, 60, false);
    character.anims.push(a);
    a = new Anim("images/jumpdown6x65x75.png", 6, 65, false);
    character.anims.push(a);
}
As you can see, having the animation details set for each Anim object allows for some variation. The frame width is different for one of the animations and there are more frames in the walking animation than in the jumping animations. Our object oriented technique is now proving useful as it allows for variations without adding to the code complexity.
Changes to the animation in current use also act as a status for the character. The different actions supported by the animations may be unique to each Actor instance. Assuming that to be the case we can add some new methods to just this one Actor instance (so no prototype keyword).
character.jump = function() {
    if(this.current === 1 || this.current === 2) {return;}
    this.hadBoost = false;
    this.anims[1].frame = -1;
    this.current = 1;
    this.moveY = game.jump;
    this.jumping = true;
};
That method checks that the character is not currently jumping or falling and then switches the frame set to jumping and sets the moveY value accordingly.
The next method adds gravity to the whole process and sees the character through all of the associated actions:
character.manageActions = function() {
    if(this.current === 1){
        this.moveY += game.gravity;
        if(this.moveY >= 0){
            this.anims[2].frame = -1;
            this.current = 2;
        }
    } else if(this.current === 2){
        this.moveY += game.gravity; // TV ??
        if(this.y >= canvas.height - this.height){
            this.moveY = 0;
            this.y = canvas.height - this.height;
            this.anims[0].frame = -1;
            this.current = 0;
        }
    }
};
Although these actions might be unique to this one character it is highly likely that all Actor instances will have some behaviours to manage. On that basis, I thought it might be a good idea to go back and add an empty (do nothing) function to the Actor object. Then I added a call to manageActions() to the bottom of the Actor animate() function. The empty function is connected to the Actor object by the prototype keyword and looks like:
Actor.prototype.manageActions = function() {};
The last lines of Actor animate() method are changed to:
    if(game.state == game.states.running){
        this.x += this.moveX;
        this.y += this.moveY;
    }
    this.manageActions();
If the manageActions() method has been overridden for an Actor instance then the specific method (like our character’s) will be executed but if not, the shared function that does nothing will be called and will do nothing. This ensures that all of our Actor objects can share more common methods.
We can now set the jump and gravity values in the game object. Also add a Boolean called barDown to record when the keyboard spacebar is used as the trigger for jumping.
var game = {
    states: Object.freeze({"start": 0, "running":1, "over": 2,"end": 3}),
    speed: 50,
    state: null,
    tmr: null,
    gravity: 0.75,
    jump: -12,
    barDown: false
};
While editing the initialise() function to call buildCharacter() we can add a couple of event listeners to handle keyboard input.
function initialise() {
    canvas.width = 800;
    canvas.height = 500;
    buildCharacter();
    window.addEventListener("keydown", keyPressed);
    window.addEventListener("keyup", keyReleased);
    game.state = game.states.running; // testing
    game.tmr = setInterval(drawFrame, game.speed);
}
Then we need to add the keyboard event handlers:
function keyPressed(e) {
    switch (game.state){
       case game.states.start:
           break; // manage start of game
       case game.states.running:
           //manage character actions
           if(e.keyCode === 32){
               game.barDown = true;
               character.jump();
           }
           break;
       case game.states.end:
           break; // manage restart
    }
}
And
function keyReleased(e) {
    if(e.keyCode == 32){
        // space bar released
        game.barDown = false;
    }
}
Time for another test. Our character should happily jump and then land when the space bar is pressed.
Perhaps this is a good moment to review the JavaScript from this chapter so far.
Right from the first game, we hopefully got used to the idea that JavaScript objects were great for collecting variables together into related groups. This certainly tidied up the code and made it easier to understand as most variables were clearly identified as belonging to a group. When we got to the “Flappy Bird” game we extended the JavaScript object concept by adding methods to the Sprite and bird objects. This meant that at least the key functions that manipulated the Sprite or bird also clearly belonged to that object.
This chapter has already gone a bit further by introducing the idea that one object could inherit the structure and content of another. On one level it might have been more impressive if I had suggested making the Actor object inherit from the Sprite object but I was worried that some of the detail might have been confusing. So instead of the Actor being the more advanced “child” of the Sprite object they are both siblings who inherit some basic structure from a Sprig object with some added features.
One immediate benefit in the code already is that sprite functions are shorter and clearly associated with their object types. Earlier in this chapter there was an inserted section that introduced programming language classes. Practitioners of class-based programming would be keen to ensure that no values belonging to a class (object for us) were manipulated by code external to a class. In object-oriented programming class values should be set by methods but never directly. This restriction is intended to ensure that class values are never corrupted by external code. Using methods to set or return values means that the programmer designing the class has the opportunity to ensure that only valid values make it into a class instance. How far should we follow a pattern like that in our JavaScript code?
Let’s try an easy example. One of the things that the character.manageActions() method does is to change the current animation and reset the new animation to the beginning. We could (probably, should) add a very short method at the end of Anim object so that it looks like this:
var Anim = function(imgSrc, frames, frameWidth, repeat){
    this.img = new Image();
    this.img.src = imgSrc;
    this.frames = frames;
    this.frameWidth = frameWidth;
    this.frame = -1;
    this.default = 0;
    this.repeat = repeat;
    this.reset = function(){this.frame = -1;};
};
That last line added a method to the Anim object type directly in the constructor so no need to use the prototype keyword. The new method simply resets the frame value to -1 and the method will be shared by all Anim instances.
We should then do something similar to the Actor object.
var Actor = function(x, y){
    Sprig.call(this, x, y);
    this.anims = [];
    this.current = 0;
    this.height = 0;
    this.resetCurrent = function(newVal){
        this.current = newVal;
        this.anims[this.current].reset();
    };
};
The new resetCurrent() method changes the value of current (and therefore the animation) and then calls the reset() method for that animation.
With those two new methods in place we can re-visit the character.manageActions() method and replace the two pairs of lines that reset the current value and the animation frame value with a single line like:
this.resetCurrent(2);
        and later:
this.resetCurrent(0);
With a similar change for the character.jump() method.
character.jump = function() {
    if(this.current === 1 || this.current === 2) {return;}
    this.hadBoost = false;
    this.resetCurrent(1);
    this.moveY = game.jump;
    this.jumping = true;
};
Those changes “feel” tidier in my opinion but the best approach is not always as clear as we might hope. Consider the fact that we will inevitably want to add some collision detection so we will probably want some code to find the bounding rectangle of a Sprite or Actor. We could take a similar route to the one we used for Flappy Bird. The Rect constructing function would need to differentiate between a Sprite and an Actor for two of the rectangle dimensions but the code would be straightforward (don’t rush to type the next function in though).
var Rect = function(sprite){
    this.x = sprite.x;
    this.y = sprite.y;
    if(sprite instanceof Actor){
        this.width = sprite.anims[sprite.current].frameWidth;
        this.height = sprite.anims[sprite.current].img.height;
    } else {
        this.width = sprite.img.width;
        this.height = sprite.img.height;
    }
};
Note the “instanceof” keyword used there.
If you wanted to check that a given sprite was not an instance of Actor then the code would have to read:
if(!(sprite instanceof Actor))
If the ! operator had been just in front of sprite (!sprite) then that would have meant the code would always return false because not sprite could never be an instance of Actor even if sprite was.
A better way to retrieve bounding rectangles would be to add methods to the Sprite, Anim and Actor objects. Again, don't rush to change the code but review the following:'
Sprite.prototype.getRect = function() {
    return {x: this.x, y: this.y, width: this.img.width,
                                height: this.img.height};
};
Anim.prototype.getSize = function() {
    return {width: this.frameWidth, height: this.img.height};
};
Actor.prototype.getRect = function() {
    let dims = this.anims[this.current].getSize();
    dims.x = this.x;
    dims.y = this.y;
    return dims;
};
Even better, lets go with the set of methods written as:
Sprite.prototype.getRect = function(){
    return {x: this.x, y: this.y, width: this.img.width,
                                                height: this.img.height};
};
Anim.prototype.getRect = function(x, y){
    return {x: x, y: y, width: this.frameWidth, height: this.img.height};
};
Actor.prototype.getRect = function(){
    return this.anims[this.current].getRect(this.x, this.y);
};
Which is neater. Having the sprite types return their bounding rectangle meant that we do not have to access their internal values from an external function. The big point is that there are many options facing you, the programmer, at every stage in developing your code. There is no single “right” way to do it. We can only strive to write code that that is clear and concise.
Stage 4
Now to explore some techniques for developing a platform game in particular.
In the Flappy clone we left the game background as a far distant and unmoving city-scape. In this game we want to add to the illusion of forward movement by creating a background that our character can travel past, best implemented as a sprite.
Again, for clarity, it would be a good idea to add another JavaScript file to the project – called background.js. This file will need adding to the HTML file <head> section after the two prior JavaScript file references already there.
In that new JavaScript file, add an object to hold some background sprites and some useful values.
var Background = {
    sprites: [],
    backSpeed: -0.5,
    bgWidth: 1024
};
Notice the low value for the backSpeed property; distant backgrounds do no rush past. To use the prepared background image from the game image pack we can create a function that adds two sprites to the background object’s sprites array. Each of the images is wider than the game area which helps to avoid the background being too repetitive plus the left and right-hand edges “connect”, visually, so we can join one image to the other on the game <canvas>.
function addBackgrounds(){
    let back = new Sprite("images/background.png", 0, 0);
    back.moveX = Background.backSpeed;
    Background.sprites.push(back);
    back = new Sprite("images/background.png", Background.bgWidth, 0);
    back.visible = false; // do not draw while off screen
    back.moveX = Background.backSpeed;
    Background.sprites.push(back);
}
Please add a call to the addBackgrounds() function to the initialise() function in main.js.
Now we can add a function to manage the background by always ensuring that one of the background sprites will be visible and that as one scrolls off to the left it is repositioned to the right ready to come back into view later. We can add this method to the Background object.
This new method introduces a couple of Array manipulation methods that are built in to JavaScript array objects. Array.shift() removes (and returns) the first element in an array while Array.splice() can be used to inject a new element at a specified position. [splice() can also be used to replace one or more array elements.]
Background.animate = function(){
    if(this.sprites[0].x <= -this.bgWidth){
        let bg0 = this.sprites.shift(); // swap backgrounds in array
        bg0.visible = false;
        bg0.x = this.sprites[0].x + this.bgWidth;
        this.sprites.splice(1, 0, bg0);
    } else if(!this.sprites[1].visible){
        if (this.sprites[1].x <= canvas.width){
            this.sprites[1].visible = true;
        }
    }
    for(let b = 0; b < this.sprites.length; b++){
        this.sprites[b].animate();
    }
};
That Background.animate() method should be called from the reDraw() function. So, add that now.
Time to give the latest code additions a test run. You should see that the background appears to move more slowly than the character seems to be walking. This starts to create a three-dimensional effect for our two-dimensional game. If you can’t see the character then revisit the drawFrame() function as you are probably drawing the background over her – call the background animation before the character’s animation.
The 3D effect can be further enhanced with another background “layer” between the foreground action and the fairly “distant” layer just added. Start by adding a second speed value to the Background object.
var Background = {
    sprites: [],
    backSpeed: -0.5,
    bgWidth: 1024,
    midSpeed: -2.25
};
We can then extend the addBackgrounds() function with some code to add two more sprites to the Background object array.
back = new Sprite("images/altmid.png", 0, canvas.height - 273);
back.moveX = Background.midSpeed;
Background.sprites.push(back);
back = new Sprite("images/altmid.png", 0, canvas.height - 273);
back.visible = false;
back.moveX = Background.midSpeed;
Background.sprites.push(back);
Now we need to extend the Background.animate() method to handle the second pair of background sprites. This time we can use the Array.pop() method to remove and return the last element of an array. They can then be swapped and pushed back. The check on visibility can be moved to the loop managing the background sprite animations.
Background.animate = function(){
    if(this.sprites[0].x <= -this.bgWidth){
        // swap backgrounds in array
        let bg0 = this.sprites.shift();
        bg0.visible = false;
        bg0.x = this.sprites[0].x + this.bgWidth;
        this.sprites.splice(1, 0, bg0);
    } else if (this.sprites[2].x <= -this.bgWidth){
        let bg3 = this.sprites.pop();
        let bg2 = this.sprites.pop();
        this.sprites.push(bg3);
        bg2.visible = false;
        bg2.x = bg3.x + this.bgWidth;
        this.sprites.push(bg2);
    }
    for(let b = 0; b < this.sprites.length; b++){
        if(b === 1 || b === 3){
            if((!this.sprites[b].visible) &&
                this.sprites[b].x <= canvas.width){
                this.sprites[b].visible = true;
            }
        }
        this.sprites[b].animate();
    }
};
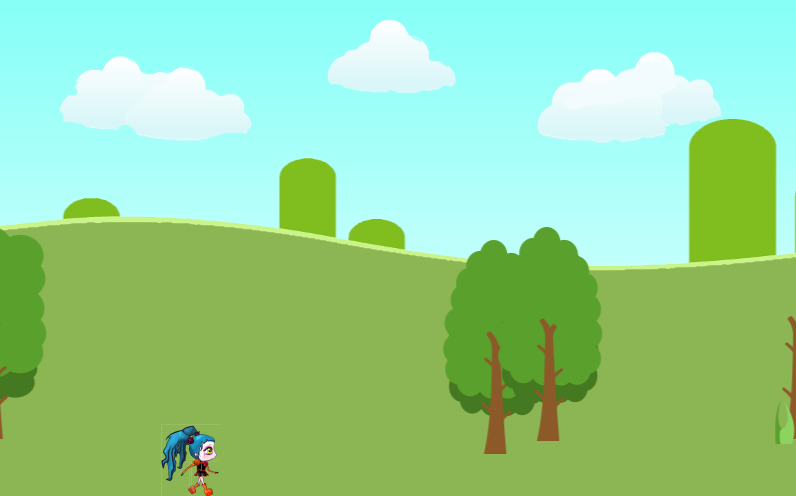
If you give it a try then you should see a very nice “walk in the park”.
This technique of using multiple background images and sprites (known as parallax scrolling) allows you, as a game author, to develop games that can express the mood as well as the scenery for just about any platform game storyline.
Before progressing further with this program, I decided that I needed to make some measurements to help set out the rather more exciting elements like platforms and pitfalls. I could easily tweak the jump and gravity values but I first needed to know how high a jump was and how far a jump forward was. I built a simple squared image to act as an initial continuous platform to be added to the game. This involved something very similar to the way we added the background sprites. I added a new object to the program to hold the new sprites. Again, to help keep the code organised, add a new JavaScript file called platforms.js (with a reference in the HTML <head> section) and start it with the Platforms object.
var Platforms = {
    sprites: []
};
Then a very simple addPlatforms() function to just set up an initial array of measurement sprites.
function addPlatforms() {
  let w = 0;
  while (w < canvas.width){
    let p = new Sprite("images/testPlatform.png", w, canvas.height - 128);
    p.moveX = -5;
    Platforms.sprites.push(p);
    w += 128;
  }
}
We can then add an animate() method to the Platforms object.
Platforms.animate = function(){
    for(let i = 0; i < this.sprites.length; i++){
        this.sprites[i].animate();
    }
    if(this.sprites[0].x <= -128){
        let p0 = this.sprites.shift();
        p0.x = this.sprites[this.sprites.length - 1].x + 128;
        this.sprites.push(p0);
    }
};
You can run the tests after adding a call to addPlatforms() to the initialise() function and a call to Platforms.animate() to the drawFrame() function – after the backgrounds and before our character is drawn.
You now have a way of measuring the height and forward length of a jump in a way that can be temporarily added to any game of a similar type you might be creating.
I had the feeling that the character might need a bit of a boost when jumping. Not all of the time perhaps, but when faced with a bit of a challenge. I decided to use the value held in the game object that recorded when the keyboard space bar was in the down position.
The eagle eyed will already have spotted that the character sprite already has a “hadBoost” Boolean value in case of just this need. So all we have to do is add something to the character.jump() method to apply the boost. But – I am going to short-circuit this approach and say that boosting a jump after it had started looked rather too artificial. Then, I wondered about just using the <shift> key to increase the jump value when the space bar was pushed.
That meant I could rename “barDown” as “shiftDown” in the game object. Then the keyPressed() code could become:
function keyPressed(e) {
    switch (game.state){
       case game.states.start:
           break;
       case game.states.running:
           if(e.keyCode === 32){
               //game.barDown = true;
               character.jump();
           } else if (e.keyCode === 16) {
                game.shiftDown = true;
           }
           break;
       case game.states.end:
           break;
    }
}
keyreleased() became:
function keyReleased(e) {
    if(e.keyCode === 16){
        game.shiftDown = false;
    }
}
Then a tweak to character.jump() to finish jumping:
character.jump = function() {
    if(this.current === 1 || this.current === 2) {return;}
    //this.hadBoost = false;
    this.resetCurrent(1);
    this.moveY = game.shiftDown ? game.jump + game.jump / 3 : game.jump;
    this.jumping = true;
};
Which leaves the opportunity to edit that boost quantity to suite how the game develops.

Stage 5
So far, the development of this game type has been broadly based upon what was learned writing the flappy bird game. Now it is time to add some new features to our character object and to introduce interaction with sprites representing platforms, hazards and other objects.
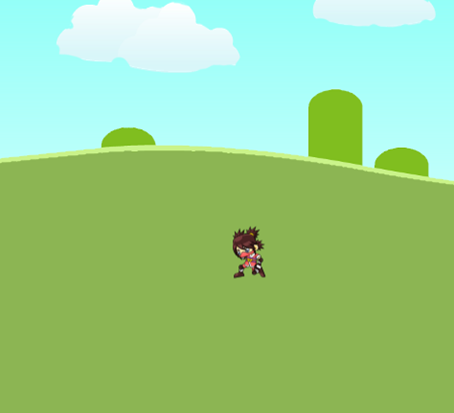
For the moment, we can discard background movement as we look at controlling the movement of our character around other game features. In fact, it is time to retire our first doughty female protagonist and switch to a slightly smaller ninja styled figure. Character and protagonist size is important in platform games as screen real-estate is limited.
The first step in this stage is to simplify the game scene so we can concentrate on developing new features. Edit the addBackgrounds() function to comment out or remove the two lines that set the moveX values for the first two sprites. Then comment out all of the lines that add the second two background sprites. You can then visit the Background.animate() function and comment out all of the lines that precede the for loop. The active lines should now only be:
for(let b = 0; b < this.sprites.length; b++){
    if(b === 1 || b === 3){
        if((!this.sprites[b].visible) &&
            this.sprites[b].x <= canvas.width){
            this.sprites[b].visible = true;
        }
    }
    this.sprites[b].animate();
}
Next comment out the line in the drawFrame() function that calls Platforms.animate().
We can now make some significant changes to the buildCharacter() function to lay the foundations for some more powerful capabilities. The line creating the character also needs a small adjustment to compensate for the change in character height.
var character = new Actor(160, 436);
function buildCharacter(){
    character.height = 64;
    character.blockRight = character.blockLeft = false;
    character.dropTo = null;
    let a = new Anim("images/idle10x37x64.png", 10, 37, true);
    a.pingPong = true;
    character.anims.push(a);
    a = new Anim("images/RunRight10x46x64.png", 10, 46, true);
    character.anims.push(a);
    a = new Anim("images/RunLeft10x46x64.png", 10, 46, true);
    character.anims.push(a);
    a = new Anim("images/JumpRight6x40x64.png", 6, 40, false);
    character.anims.push(a);
    a = new Anim("images/JumpLeft.png", 6, 40, false);
    character.anims.push(a);
    a = new Anim("images/LandRight.png", 4, 40, false);
    character.anims.push(a);
    a = new Anim("images/LandLeft.png", 4, 40, false);
    character.anims.push(a);
}
This new character has seven Anim components and the first introduces a new option that we need to provide some support for in the code. This first Anim is for when the character is not doing anything else. It is an “idle” mode. The new feature is the pingPong attribute. The idea here is that instead of always starting the animation “loop” from the beginning it sometimes looks better if the loop reverses instead. The feature is a variant on the “repeat” option. Add a couple of lines to the Anim constructor:
var Anim = function(imgSrc, frames, frameWidth, repeat){
    this.img = new Image();
    this.img.src = imgSrc;
    this.frames = frames;
    this.frameWidth = frameWidth;
    this.frame = -1;
    this.default = 0;
    this.repeat = repeat;
    this.pingPong = false;
    this.pp = 1;
    this.reset = function(){this.frame = -1;};
};
Then add the new code to the Anim object animate() method:
Anim.prototype.animate = function(x, y) {
    if(game.state == game.states.running){
        if(this.repeat){
            if (this.pingPong){
                this.frame += this.pp;
                if(this.frame >= this.frames || this.frame < 0){
                    this.pp *= -1;
                    this.frame += this.pp;
                }
            } else {
                this.frame++;
                this.frame %= this.frames;
            }
        } else {
            if(this.frame < this.frames -1){
                this.frame++;
            }
        }
    } else {
        this.frame = this.default; // stop animation
    }
    let clipx = this.frame * this.frameWidth;
    ctx.drawImage(this.img, clipx, 0, this.frameWidth, this.img.height,
                                 x, y, this.frameWidth, this.img.height);
};
A quick test should show an alert (or very nervous) ninja in action.

The code that built the character included a set of sprite image files for right and left movement. So now is the time to add a little control over this character based upon keystrokes from the game player. In preparing for that, the game object could do with some new variables to keep track of the keys being pressed. Following the measurement exercise, I also adjusted the “jump” value.
var game = {
    states: Object.freeze({"start": 0, "running":1, "over": 2,"end" : 3}),
    speed: 50,
    state: null,
    tmr: null,
    gravity: 0.75,
    jump: -14,
    shiftDown: false,
    leftDown: false,
    rightDown: false,
    ctrlDown: false
};
Now the keyPressed() function to add those new key states:
function keyPressed(e) {
    switch (game.state){
       case game.states.start:
           break;
       case game.states.running:
            switch(e.keyCode){
                case 32:
                case 38:
                    character.jump();
                    break;
                case 37:
                    game.leftDown = true;
                    break;
                case 39:
                    game.rightDown = true;
                    break;
                case 17:
                    game.ctrlDown = true;
                    break;
                case 16:
                    game.shiftDown = true;
            }
            break;
        case game.states.end:
           break;
    }
}
With the expected changes to keyReleased():
function keyReleased(e) {
    switch(e.keyCode) {
        case 16:
            game.shiftDown = false;
            break;
        case 17:
            game.ctrlDown = false;
            break;
        case 37:
            game.leftDown = false;
            break;
        case 39:
            game.rightDown = false;
            break;
    }
}
Earlier in this chapter we made use of the “current” Anim index value to keep a track of just what the character sprite was doing – particularly in the .jump() and .animate() methods. With the introduction of more potential behaviours, it makes sense to switch to having a state value. The range of possible values can be held in another new object placed at the top of the character.js file.
var flags = {
    idle: 0,
    left: 1,
    right: 2,
    jump: 4,
    fall: 8
};
The values for the individual “flags” are increasing powers of 2. This means that we can represent two such values within a single variable using bit manipulation. This is a useful programming technique that can be applied in (probably) all programming languages. We don’t need a value for “jump right” if we can combine a jump state with a right (or left) state.
Storing multiple values in a single variable
The example in this chapter is one where we might want to store a jump or falling value along with a direction value. On the face of it that is pretty straightforward. We could just add a number representing each of those states to a common variable. Thus, if left was 1 and jump was 4 then the variable would hold 5. A problem arises when your code wants to check (say) if the current direction is left. The variable would signal that if it’s value was 5 or 9 so we could check for both of those values. That would get more complex if we had some additional behaviours – maybe “attack” or walk as well as run. The answer is to use bitwise operators to set, reset and check for particular status values in a status variable.
This is the not first time in this book that we have had to face up to the fact that computers store everything as binary numbers. The appendices include a general introduction to binary numbers which is worth checking out but just for the moment it is sufficient to say that any power of 2 (2, 4, 8, 16 etc.) is represented within a binary number by a unique bit. A binary representation of 2 would be 0010 and a binary representation of 8 would be 1000. The decimal number 10 would see both the 8 and the 2 bit set on – 1010 in binary.
The three bitwise operators we are going to use are Bitwise AND, OR and XOR. These are applied using two values (technically operands).
| Bitwise | Operator | Description |
| AND | & | Returns a 1 for each bit position where the bits in the same position of each operand are both 1 |
| OR | | | Returns a 1 for each bit position where the value in either operand is 1 |
| XOR | ^ | Returns a 1 for each bit position where one or other operand has a 1 but not both. |
What does that mean in actual practice though?
If we have a variable (let’s call it status) we can use the OR operator to add a power of 2 to it but with the bonus extra that if status already had that value then it would remain the same.
status = status | 4; (or in short form status |= 4;)
That would have the same effect as: status += 4; but without the problem that if the operation occurred twice without resetting the status value in some way the result would not be to increment status to 8.
If we want to check if status contains the value 4, we could write:
if(status & 4) { // then do some stuff }
That would work because if status did not contain 4 then the bitwise operation would return zero (false) and if it did contain 4 then it would return 4 and that non zero value would be treated as true by the if statement.
If we need to unset a value in status then we can use the XOR operator. So, if status contains 12 (4 and 8 bits set on) and our code executed:
status ^= 4;
Status would now hold the value 8 as the 4 bit would be set to zero.
Now with all that in mind we can add a final line to the buildCharacter() function to set the initial state.
character.state = flags.idle;
Then add the following code to the character manageActions() method:
character.manageActions = function() {
    if(game.rightDown){
        if(!(this.state & flags.right)){
            this.resetCurrent(1);
            this.state = flags.right;
        }
        this.moveX = 5;
    } else if(game.leftDown){
        if(!(this.state & flags.left)){
            this.resetCurrent(2);
            this.state = flags.left;
         }
         this.moveX = -5;
    } else {
        if((this.state !== flags.idle)){
            this.resetCurrent(0);
            this.state = flags.idle;
            this.moveX = 0;
        }
    }
};
A quick test should have your new character rushing right and left in response to the equivalent arrow keys. The code responds to the arrow key values stored in the game object by resetting the current sprite image together with the character state.
Next we can next add some code to the character jump() action:
character.jump = function() {
    if(this.state === flags.idle || (this.state & flags.jump) ||
                             (this.state & flags.fall)) {return;}
    this.state |= flags.jump; // add jump to status
    if(this.state & flags.left){
        this.resetCurrent(4);
    } else {
        this.resetCurrent(3);
    }
    this.moveY = game.shiftDown ? game.jump * 1.3 : game.jump;
};
If you try that code out, you will see that the character can only jump when headed left or right and that (sadly) what goes up does not come down, so that’s next. Try adding a new character method which we can call from the top of the character.manageActions() method. The code not only brings the character back down to earth by applying gravity, it slows the forward momentum and switches between sprite Anim instances when required.
character.manageFall = function(){
    this.moveY += (this.moveY >= 14) ? 0 : game.gravity; // TV
    if(this.state & flags.jump){
        if(this.moveY >= 0){
            this.state ^= flags.jump;
            this.state |= flags.fall;
            this.moveX = (this.moveX < 0) ? -2 : 2; // slow f'wd motion
            this.resetCurrent((this.state & flags.right) ? 5 : 6);
        }
    } else {
        if(this.y >= canvas.height - this.height){
            this.moveY = 0;
            this.y = canvas.height - this.height;
            this.state ^= flags.fall;
            this.resetCurrent((this.state & flags.right)? 1 : 2);
        }
    }
};
Then add the following lines to the start of the manageActions() method:
if((this.state & flags.jump) || (this.state & flags.fall)){
    this.manageFall();
    return;
}
Note the return statement that terminates that section and stops any of the following code in the function being executed when the character is jumping or falling.
Another test should have your character jumping and landing. Don’t forget to use the <shift> key to check that the boost works as well.
Game characters are not going to be living in an empty world so now is the time to think about adding some collision detection. I think that we can probably get by with the simplest function that we first tried with flappy bird although the other techniques might apply in a different game setting.
Do you remember the code that detected an intersection of two rectangles? The function name has changed here but the tests are the same. I added this general use function to the main.js file.
function bump(rectA, rectB){
    return Math.max(rectA.x, rectB.x) < Math.min(rectA.x +
                        rectA.width, rectB.x + rectB.width) &&
        Math.max(rectA.y, rectB.y) < Math.min(rectA.y +
                         rectA.height, rectB.y + rectB.height);
}
There is a strong argument for collecting all of the likely sprite types with which our character (and other Actors) might collide into a single object. This allows us to use a JavaScript feature to test for collisions against a whole set of the other sprite types. Place the following object into the main.js file just after the game object.
var objects = {
    platforms: [],
    stops: [],
    things: [],
    coins: []
};
Any sprite based upon our Actor model might well want to do some collision detection although the response to any collision may well be specific to an instance or to a type. This suggests that the primary collision detection function should be added to the Actor object.
Actor.prototype.collisionDetect = function(){
    let mRect = this.getRect();
    let collisions = [];
    for (let type in objects){
        let list = objects[type];
        for(let s = 0; s < list.length; s++){
            let sRect = list[s].getRect();
            if(bump(mRect, sRect)){
                collisions.push({type: type, index: s});
            }
        }
    }
    if(collisions.length > 0){
        this.collision(collisions);
    }
};
There is a lot going on in that new function. It starts, by getting the rectangle bordering the current Actor sprite. Then an array is initialised with the intention that it should hold some details of any collisions detected (there may be more than one). The next line is interesting as it looks a bit like a for() loop but has a different syntax. What it is saying is “for each thing (given the name type in this instance) in the object called objects execute some code. As that for loop executes, the value of type is set to the names of each of the components within the objects object. Thus, it starts as “stops” then “things” and proceeds to “coins”. [Please note that the order of those values is not guaranteed so make sure any future code you write does not rely upon the order when using this technique.]
The next line in the code uses another JavaScript feature that gives us access to the internal component of an object by treating the object as if it were an array with the component name taking the place of an array index value.
Thus, the function checks each sprite in each of the arrays within the objects object to see if it has collided with the current Actor sprite. If there are any collisions then the method calls another method, called collision(), to handle them. It is that method that should belong to the individual Actor sprite (or at least type). Just to be careful we should add another dummy function to the Actor object prototype to ensure that a method with the right name will always exist.
Actor.prototype.collision = function(){};
On the strength of that, we should now go and add a collision() method to our character that overrides the default empty version.
character.collision = function(collisions){
    for (let c = 0; c < collisions.length; c++){
        switch(collisions[c].type){
            case "things":
                if(this.state === flags.left ||
                                  this.state === flags.right){
                    this.block();
                }
                break;
        }
    }
};
All that code does, so far, is spot a collision with a sprite in the “things” array and call this.block(). We had better add that method.
character.block = function(){
    this.moveX = 0;
    this.resetCurrent(0);
    if(this.state & flags.right){
        game.rightDown = false;
        this.blockRight = true;
    } else if(this.state & flags.left){
        game.leftDown = false;
        this.blockLeft = true;
    }
    this.state = flags.idle;
};
The objective of the function is to ensure that if the character runs into a screen object (sprite) then the character comes to a halt and does not proceed. To stop repeated attempts to walk (or run) through an object the function sets two new variables belonging to our character. They are blockRight and blockLeft. We can add a line to the buildCharacter() function to initialise those variables.
character.blockRight = character.blockLeft = false;
We also now need to change the lines in the character manageActions() method that deal with right and left movement to check and reset those variables. Locate and edit as follows:
if(game.rightDown && ! this.blockRight){
    if(!(this.state & flags.right)){
        this.resetCurrent(1);
        this.state = flags.right;
        this.blockLeft = false;
    }
    this.moveX = 5;
} else if(game.leftDown && !this.blockLeft){
    if(!(this.state & flags.left)){
        this.resetCurrent(2);
        this.state = flags.left;
        this.blockRight = false;
        }
        this.moveX = -5;
} else {
I hope those additions make sense. Assuming so, then maybe we could do with adding a temporary test object to run into. This code can go into the main.js file.
function addTestObject() {
    let s = new Sprite("images/weight.png", 500, canvas.height - 48);
    objects.things.push(s);
}
function manageTestObject() {
    objects.things[0].animate();
}
Then add a call to addTestObject() to the initialise() function plus a call to manageTestObject() to drawFrame().
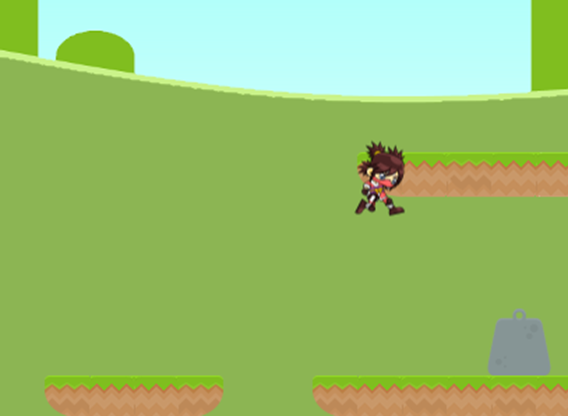
Running a test should see that our character will stop once he or she has run into the large weight. If you use the jump function and clear the weight sprite you can check that the character is also blocked when it runs into the weight from the other direction. What happens if the character drops onto the weight object from a jump that is a bit short? We need to decide how to handle such events. I quite like the idea of just bouncing off.
See what happens by changing the “things” case in character.collision() to read:
case "things":
    if(this.state === flags.left || this.state === flags.right){
        this.block();
    } else if(this.state & flags.fall){
        this.state ^= flags.fall;
        this.state |= flags.jump;
        this.moveY = game.jump / 3;
    }
    break;
Looks like an improvement as the character now does not get stuck within the bounds of another sprite but you might again notice the limitations of using bounding rectangles to detect collisions (something to think about).
Stage 6
Considering that this chapter is about 2D platform games it has taken a long time to get to some platforms. Mind, there have been some interesting JavaScript excursions along the way so hopefully you are better equipped to tackle some animation challenges of your own whichever way this project develops.
We could, I suppose, try creating a random set of platforms but there would be a real risk that the result would be boring to play. A good game does not happen by chance and a random approach would run against the idea that a game should have a sequence of objectives (even if they are cunningly obscure to start with). I am sure that you would want to create a game with one or more planned layouts. A pad of squared paper is great for working out a layout and deciding what extra features to add at different positions.
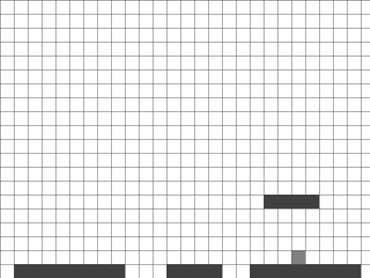
We can explore one technique for describing a platform game layout in simple terms so that it is easy to enter to the program and then use code to create the required sprites.
We can start with an array holding a list of image files to be used for the platforms:
var platformImages = [
    "images/Grass3.png",
    "images/Grass4.png",
    "images/Grass6.png",
    "images/Grass8.png",
    "images/Logs3.png",
    "images/Logs6.png"
];
As a good game might include multiple “levels” of difficulty and thus multiple platform layouts, having an object to contain those layouts and another object type to describe the platform sections within those layouts sort of follows on.
var Sect = function(x, y, imageIndex){
    this.x = x;
    this.y = y;
    this.imageIndex = imageIndex;
};
var Level = {
    sections: [
        new Sect(1, 1, 3),
        new Sect(12, 1, 1),
        new Sect(18, 1, 3),
        new Sect(19, 6, 2)
    ]
};
We can then add a build() method to Level to add the sprites to the platforms array in the objects object.
Level.build = function() {
    objects.platforms = [];
    for(let s = 0; s < this.sections.length; s++){
        let p = new Sprite(platformImages[this.sections[s].imageIndex],
            this.sections[s].x * 32,
            canvas.height -  this.sections[s].y * 32);
        objects.platforms.push(p);
    }
};
The x and y values for the platform sprites stored in Sect object instances are simply the x and y values from a squared paper draft design. The values are scaled when the layout is turned into a set of platforms. My choice of scale was based upon the dimensions of the platform images I had which are all multiples of 32 pixels.
The scale values can be changed to meet the requirements of any of your designs and you have probably already thought that the number should probably be located in one of the game’s objects as a variable (or const). There is no reason why the x/y values used to create new Sect objects when building a level should always be integers. Fractional values could give greater precision while retaining the simplicity of this approach.
We can then delete the old Platforms.animate() method and the, now redundant, addPlatforms() function. We can also replace the manageTestObject() function in main.js with a new method attached to the objects object that will animate all of the non-character sprites.
objects.animate = function(){
    for(let groups in this){
        let list = this[groups];
        for(let i = 0; i < list.length; i++){
            list[i].animate();
        }
    }
};
Then we will need is a call to Level.build() in the initialise() function:
function initialise() {
    canvas.width = 800;
    canvas.height = 500;
    buildCharacter();
    addBackgrounds();
    Level.build();
    addTestObject();
    window.addEventListener("keydown", keyPressed);
    window.addEventListener("keyup", keyReleased);
    game.state = game.states.running; // testing
    game.tmr = setInterval(drawFrame, game.speed);
}
Plus, drawFrame() needs to call objects.animate()
function drawFrame() {
    ctx.clearRect(0, 0, canvas.width, canvas.height);
    Background.animate();
    objects.animate();
    character.animate();
}
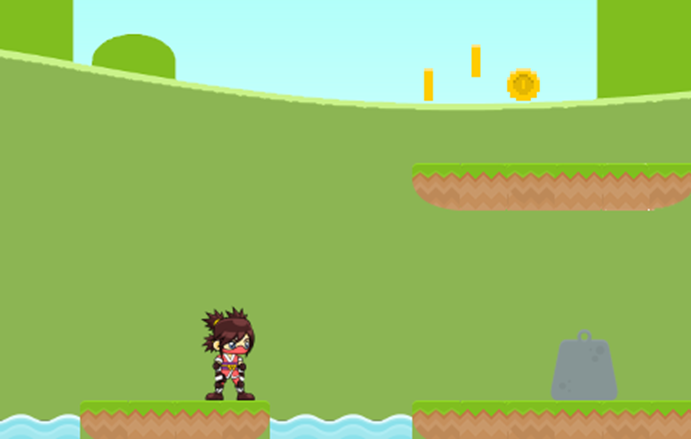
A test run should show some basic platforms but our character and the weight are still floundering at the bottom of the play area.
Moving the temporary test object is a straightforward edit for x and y in addTestObject():
function addTestObject() {
    let s = new Sprite("images/weight.png", 700, canvas.height - 80);
    objects.things.push(s);
}
The line creating our character can be edited to provide a new starting y position:
var character = new Actor(160, 404);
Some thought might need to be given to setting a suitable start position for the main character when there are level changes unless each level design allows for a common initial location.
A new round of testing should show that the character moves to the right at the new level and interacts with the weight object. However, the gaps in the platforms are ignored and a jump will see the character end up at the bottom of the screen. We need to spot when the character walks off a platform and we need to help the character land safely on a platform.
The issue is that we need to detect nearby platforms as well as ones that have an intersecting rectangle with our character. The “nearby” concept might need some tuning. On the basis that any Actor objects that are mobile will probably need to do at least basic platform detection we can add a new method to the Actor object.
Actor.prototype.platformDetect = function(mRect, collisions){
    for(let p = 0; p < objects.platforms.length; p++){
        let sRect = objects.platforms[p].getRect();
        if (Math.abs(sRect.y - (mRect.y + mRect.height)) <= 16){
            let ft = mRect.x + mRect.width * 0.33;
            let lt = mRect.x + mRect.width * 0.66;
            if((ft >= sRect.x && ft <= sRect.x + sRect.width)||
               (lt >= sRect.x && lt <= sRect.x + sRect.width)){
                    collisions.push({type: "platform", index: p});
            }
        }
    }
};
We can then edit the collisionDetect() method to skip the platforms in the main loop as they need specialist attention but to call the new method to handle them at the end.
Actor.prototype.collisionDetect = function(){
    let mRect = this.getRect();
    let collisions = [];
    for (let type in objects){
        if(type === "platforms"){continue;}
        let list = objects[type];
        for(let s = 0; s < list.length; s++){
            let sRect = list[s].getRect();
            if(bump(mRect, sRect)){
                collisions.push({type: type, index: s});
            }
        }
    }
    this.platformDetect(mRect, collisions);
    if(collisions.length > 0){
        this.collision(collisions);
    }
};
We can add a line right at the top of character.manageActions that can be used to signal if the character is not standing on a platform:
this.dropTo = null;
A variable that has not been assigned a value has the type “undefined”. You can write code that checks if a variable has been assigned a value:
var uVal;
if(uVal === undefined) {
  // do some things
}
If a variable would normally be used to point to an object but (say) is temporarily not yet pointing to an object then it is normally assigned the value null.
var mObject = null;
if(mObject === null) {
  // then do some other things
}
Both null and undefined will resolve to false, so you can write:
if(mObject || uVal) {
  // code not going to be executed but
} else {
  // code here will be executed
}
We can then add some (incomplete code) to a new “platform” case in character.collision():
case "platform":
    let p = objects.platforms[collisions[c].index];
    if(p.y >= this.y + this.height){
        this.dropTo = collisions[c];
    } else {
        // things to tackle next
    }
    break;
Now, we have the new variable set to null or pointing to a platform object we can return to the code in manageActions().
he code dealing with falling in the manageFall() method needs to change from:
if(this.y >= canvas.height - this.height){
    this.moveY = 0;
    this.y = canvas.height - this.height;
    this.state ^= flags.fall;
    this.resetCurrent((this.state & flags.right)? 1 : 2);
}
to:
if(this.dropTo){
    this.moveY = 0;
    this.y = objects.platforms[this.dropTo.index].y - this.height;
    this.state ^= flags.fall;
    this.resetCurrent((this.state & flags.right)? 1 : 2);
}
Then we need to insert some code into the manageActions() method to handle our character stepping off an edge. That method should now start:
character.manageActions = function() {
    this.dropTo = null;
    this.collisionDetect();
    if((this.state & flags.jump) || (this.state & flags.fall)){
        this.manageFall();
        return;
    }
    if(!this.dropTo){
        this.state |= flags.fall;
        this.moveY = game.gravity;
        this.moveX = 0;
        this.resetCurrent((this.state & flags.right) ? 5 : 6);
        return;
    }
If those additions and edits have gone smoothly then you should now be able to navigate the game character around the simple platform layout making jumps where required. The character should be able to land comfortably on a platform after a jump.
Stage 7
It is time to introduce some new objects. Let’s start with “rewards” and decorate the place with a few collectable coins. Coins are always popular as they are easy to count towards some goal. At different levels, alternate collectables could be substituted for coins while occupying the same place in the game code.
Things like coins and other collectables will probably have one or more behaviours. So that means they should be of the Actor type. It would be nice though, if we could avoid the slightly clumsy need for the equivalent of the buildCharacter() function that added the required Anims to the character sprite. We can do that be getting the new Coin type to inherit from the Actor type. Add the new sprite type to the bottom of the sprites.js file.
var Coin = function(x,y){
    Actor.call(this, x, y);
    let a = new Anim("images/Coins5x22.png", 5, 22, true);
    a.frame = Math.floor(Math.random() * 5); // start at random frame
    this.anims.push(a);
    a = new Anim("images/stars10x33.png", 10, 33, false);
    a.default = 9;
    this.anims.push(a);
};
As we have two Actor sprites involved in any character and coin interaction, we have to decide which sprite object reacts to the collision and manages the result. On balance, I think this is best left to the character to detect the collision with the coin object dealing with the aftermath. It makes sense for all of the coins to share the same code (unless there is one special coin or reward but that object instance can override any shared reaction).
We can be confident that the new Coin type has inherited everything (including methods) created inside the function that creates an Actor object. Trouble is, we added some methods to the Actor object using the prototype keyword (things like getRect() and animate()). There are two ways that we can add those methods to our new Coin object. We can be selective and add individual methods inside the Coin constructor with code like:
this.getRect = Actor.prototype.getRect;
Alternately we can inherit all of the Actor prototype methods with a single line of code added just after the Coin constructor. This is the best way forward in this instance, so please add the line:
Coin.prototype = Object.create(Actor.prototype);
Continuing the idea that things like coins could be plotted out on the same grid as a set of platforms we could add an array of objects to the Level object to represent coins using the same planning grid scale.
,
    coins: [
        {x:2, y:3},
        {x:19, y:8},
        {x:20, y: 8.5},
        {x:21, y: 8}
    ]
The level.build() method could then create the required coin instances after creating the platform sprites.
Level.build = function() {
    objects.platforms = [];
    for(let s = 0; s < this.sections.length; s++){
        let p = new Sprite(platformImages[this.sections[s].imageIndex],
            this.sections[s].x * 32,
            canvas.height -  this.sections[s].y * 32);
        objects.platforms.push(p);
    }
    objects.coins = [];
    for(let s = 0; s < this.coins.length; s++){
        let c = new Coin(this.coins[s]. x * 32,
                         canvas.height - this.coins[s].y * 32);
        objects.coins.push(c);
    }
}
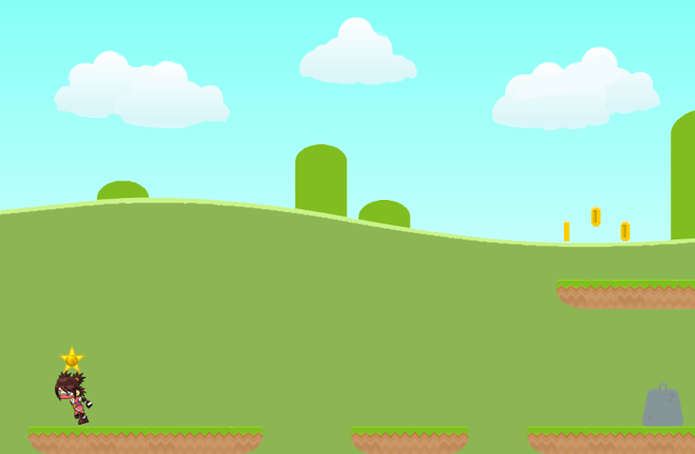
Run a quick test and you should see the coins spinning in the air above two of the platforms. There is one placed nice and near our character that we can use to test a coin collision.
Before that, and just so that we can be sure that the game can keep an account of coins “collected”, we maybe should add a cash value member to the game object that starts at zero.
We could then add a <div> to the html file before the <div> that contains the <canvas> element.
<body>
    <div><img src="images/coin0.png"><label id="lblcc">0</label></div>
    <div id="dvGame">
        <img src="images/clouds.png" id="imgGame">
        <canvas id="cvGame"></canvas>
    </div>
    <script src="main.js"></script>
</body>
The new <div> contains an image of a coin and a label to display the coin count. That should be backed up with just a touch of CSS in the main.css file.
#lblcc {
    font-size: x-large;
    margin-left: 5px;
}
Now add a short method to the game object to add or subtract (there might be tolls to pay) from the game.cash value and display the result:
game.addCash = function(val){
    this.cash += val;
    document.getElementById("lblcc").textContent = this.cash;
};
Now we can tackle the “coins” case within the switch statement in the character.collision() function.
case "coins":
    let n = objects.coins[collisions[c].index];
    if(n.visible){
        n.collision();
    }
    break;
All that needs to do is call the collision() method belonging to the coin. That, of course, is the next thing to add. All of the coin instances can share the same collision function to override the default empty function that is created for every Actor object. Make sure that the new method is added after the statement that set the Coin.prototype to the Actor prototype as we would not want to overwrite it when that line of code was executed.
Coin.prototype = Object.create(Actor.prototype);
Coin.prototype.collision = function(){
    if(this.current !== 1){
        game.addCash(1);
        this.resetCurrent(1);
        sounds.coin.play();
    }
};
Coin.prototype.manageActions = function(){
    if(this.current === 1){
        if(this.anims[1].frame === this.anims[1].default){
            this.visible = false;
        } else {
            this.y -= 5;
        }
    }
};
The new Coin manageActions() method then makes the coin instance no longer visible when the coin collision animation has run to completion. It also makes the coin rise just a bit as it twinkles into nothing.
Prototype Chains
What happens when your code calls a method on an object? First of all, JavaScript looks to see if the object instance has a method with the right name. This would be true for the character instance of Actor when the code calls manageActions() for that object. If a suitable method is not found attached to the specific object, then JavaScript searches back up the prototype chain. If collision() is called for a coin instance then no method will be found for the instance but JavaScript will find one for the Coin object type and execute that. If no collision() function had been found there, then JavaScript would next check Actor (as Coin inherits from Actor) and at that point an empty method would be found and executed. If there had been no collision() method even there, then JavaScript would have checked Sprig and then the “master” Object itself.
I am sure that at this moment (if not before) you are thinking “sound effect”. The methods used to add sound to the flappy bird game will probably work well here although you might want to add a background soundtrack to the whole thing. Once again for licensing reasons, I will leave it to you to search the available free sound sources or to record something of your own. If we assume that your sound collection has been added to a subfolder called “audio” then the sounds could be gathered into a common object (my sample object is deliberately limited so please expand on this if you want).
var sounds = {
    coin: new Audio("audio/coin.wav"),
    splash:  new Audio("audio/splash.wav")
};
Then add an automatic “rewind” to each sound function we can call from initialise(). The use of the “this” keyword might look a little strange as it refers to the Audio object. This usage is explored further in the next chapter.
function setSounds(){
    for(let aud in sounds){
        sounds[aud].onended = function(){
            this.currentTime = 0;
        };
    }
}
Then you can play any of the sounds when appropriate. As an example, this line will play a sound when added to the Coin.prototype.collision() method.
sounds.coin.play();
Time to test the first character and coin collision and check that the coins respond and that the cash count increases at the top left of the browser window.
We now have a process for offering potential rewards in the game. Now, perhaps, we should add some hazards.
Pitfalls and water traps are straightforward to implement as sprites and I am sure that with some imagination some pretty devious animated traps can be devised. Let’s drop in a water trap or two before looking at an Actor derived type with which our character might have to do battle.
With so much great code already implemented we can very quickly add a water hazard. Start by adding a new array to the objects object.
var objects = {
    platforms: [],
    water: [],
    stops: [],
    things: [],
    coins: []
};
Of course, additional hazards like snake pits (well do your worst) could be added later.
We can add an array of Sect instances to the Level object to support water traps. This short one demonstrates.
,
    water: [
        new Sect(9, 1, 6)
    ]
If later levels skip water, then all you would need is an empty array for water while maybe adding alternate hazards.
It seemed reasonable at this stage to add one or more water image file to the platformImages array but you might want to implement a distinct array of hazard image files.
var platformImages = [
    "images/Grass3.png",
    "images/Grass4.png",
    "images/Grass6.png",
    "images/Grass8.png",
    "images/Logs3.png",
    "images/Logs6.png",
    "images/water3.png"
];
The Level.build() method can then add our new sprite type.
objects.water = [];
for(let s = 0; s < this.water.length; s++){
    let p = new Sprite(platformImages[this.water[s].imageIndex],
        this.water[s].x * 32,
        canvas.height -  this.water[s].y * 32);
    objects.water.push(p);
}
To round off this simple hazard, I added code in character.collision() to handle water.
    case "water":
        sounds.splash.play();
        break;
Simple maybe, but a model for more creative hazards and other objects of your devising that can be added to any level in a similar manner.
We can now remove the code that added a test object (weight) as any such thing should now be managed in a similar manner through the Level object and Level.build().
Stage 8
Now for some baddies. There is not much “badder” than giant spiders so let’s have some of them. As they need to be animated then we should start by inheriting a new class of object from Actor in just the same way as we created the Coin object. Add this code to the sprites.js file.
var Spider = function(x,y){
    Actor.call(this, x, y);
    this.state = 0;
    this.height = 38;
    let a = new Anim("images/spiderR10x40x38.png", 10, 40, true);
    this.anims.push(a);
    a = new Anim("images/spiderL10x40x38.png", 10, 40, true);
    this.anims.push(a);
    a = new Anim("images/spiderDie.png", 10, 40, false);
    a.default = 9;
    this.anims.push(a);
};
Spider.prototype = Object.create(Actor.prototype);
We will be adding collision() and manageActions() methods as well because we want the spiders to move around within defined areas and it would be great if they could manage that for themselves. One way of doing that would be to confine the spiders with an object type that was not visible but acted as a fixed or temporary barrier to the spiders. Any individual spider could have custom code to help it navigate a specific area of the game but we will concentrate on a more general case.
We can more or less follow the formula for adding a new game element. First add spiders[] to the objects object:
var objects = {
    platforms: [],
    water: [],
    stops: [],
    things: [],
    coins: [],
    spiders: []
};
Then the Level object needs two new arrays, one for Stops and the other for Spider sprite locations:
,
    stops: [
        {x:7, y:10},
        {x:14, y:10},
        {x:19, y:7},
        {x:24.5, y: 7}
    ],
    spiders: [
        {x:8, y:9},
        {x: 20, y:6}
    ]
Level.build() then needs a couple more loops:
objects.stops = [];
for(let s = 0; s < this.stops.length; s++){
    let p = new Sprite("images/stopper.png",
            this.stops[s].x * 32,
            canvas.height - this.stops[s].y * 32);
    objects.stops.push(p);
}
objects.spiders = [];
for(let s = 0; s < this.spders.length; s++){
    let p = new Spider(this.spiders[s].x * 32,
            canvas.height - (this.spiders[s].y * 32 + 38));
    objects.spiders.push(p);
}
There is a way that we could reduce the code in that method as it gets repetitive but it would not be quite so clear and easy to understand.
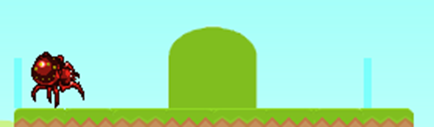
A short test should see spiders pawing at the ground on two platforms. You should also be able to see the stops intended to contain the spiders as narrow blue rectangles on the same platforms. These stops will be made transparent later. Of course, you could use other objects (like treasure chests) as stops or they could be (selectively) ignored. Such decisions are part of the game design process.
As the Actor object animate() method calls manageActions() on the object we can set about overriding the empty default Actor method with a method shared between the Spider objects.
The first line of a manageActions() method for Spider objects is one to make a call to collisionDetect() (which sits at the Actor level on the prototype chain). We could also make some provision to remove a Spider from the game if it has expired (just as for the Coin objects).
Spider.prototype.manageActions = function(){
    this.collisionDetect();
    if(this.current === 2 && this.anims[2].frame ===
                             this.anims[2].default){
        this.visible = false; // dead and gone
    }
};
The collisionDetect() method will call a collision() method for a Spider instance to list game objects that have been detected. We can create a generic collision() method for our Spiders. Remember though that you can always add a method for any specific Spider (or similar game entity) if you need some different behaviour in a particular case.
To start with, we can just get the Spider objects to respond to collisions with stops and other objects (optional on your part).
Spider.prototype.collision = function(collisions){
    for(let i = 0; i < collisions.length; i++){
        switch(collisions[i].type){
            case "things":
            case "stops":
                if(this.state === 0){
                    this.resetCurrent((this.current === 0) ? 1 : 0);
                    this.moveX *= -1; // reverse
                }
                break;
        }
    }
};
If you add a line to set the moveX value for the Spider objects as they are created in Level.build() then a test should show our new game spiders patrolling their sections of platform.
p.moveX = 3;
objects.spiders.push(p);
Adding the spiders to the game took very little work because we could re-use pre-existing code that we had built, in stages, to support what has become a hierarchy of objects and types.
The next step is to add some interaction between spiders and our character. To develop that part of the game play, I wanted to try out some alternate strategies. To that end, I decided to re-arrange the lowest level of platforms and add a spider there.
The first three sections of platform in the Level object became:
new Sect(0, 1, 3),
new Sect(8, 1, 3),
new Sect(16, 1, 3),
The water trap moved along (so edit the water Array code to read):
new Sect(24, 1, 6),
Then I added two stop objects and a spider between them:
    stops: [
        {x:7, y:10},
        {x:14, y:10},
        {x:19, y:7},
        {x:24.5, y: 7},
        {x:23.4, y: 2},
        {x:10, y:2}
    ],
    spiders: [
        {x:8, y:9},
        {x: 20, y:6},
        {x:11, y:1}
    ]
With those adjustments we have a new spider for our character to approach and maybe attack. If violence is on the agenda, then we had better add some more animations to the character object. Add the following lines to the buildCharacter() function just after the other Anim objects are added:
a = new Anim("images/AttackRight.png", 10, 48, false);
character.anims.push(a);
a = new Anim("images/AttackLeft.png", 10, 48, false);
character.anims.push(a);
a = new Anim("images/die10x62x64.png", 10, 62, false);
Then add two more values (powers of 2) to the flags object:
var flags = {
    idle: 0,
    left: 1,
    right: 2,
    jump: 4,
    fall: 8,
    attack: 16,
    die: 32
};
The character.collision() method will need some additions to deal with collisions with spidery objects. Try adding the following case to the switch statement in Character.collision:
case "spiders":
    let s = objects.spiders[collisions[c].index];
    if(s.state !== flags.die && !(this.state & flags.die)){
        if(this.state & flags.attack){
            if((this.state & flags.right) && s.x > this.x){
                s.die();
            } else if((this.state & flags.left) && s.x < this.x){
                s.die();
            } else {this.state = flags.die;}
        } else {
            this.state = flags.die;
        }
        if(this.state === flags.die){this.resetCurrent(9);}
    }
    break;
Before we write the new die() method for the Spider objects we had better add some code to the character.manageActions() method to deal with attacking and dying. The order of the code blocks in this method is important as sometimes we want to exit the method early and at other times, we want the code to “drop through” to some later sections. Add the first new block of code that deals with the dying state before the line that says if(!this.dropTo) which is also shown in the next code box.
if(this.state === flags.die){
    if(this.moveY === -10){
        if(this.y <= -(this.height)){
            this.moveY = 0;// game over
        }
    } else if(this.anims[9].frame === this.anims[9].default){
        this.moveY = -10;// dispose of the body
    }
    return;
}
if(!this.dropTo){
Then after that “dropTo” code block and just before the check on game.rightDown add a block that deals with the attack state. As you will see, holding the <ctrl> key down will put the character into the attack state.
if(game.ctrlDown){
    if(!(this.state & flags.attack)){
        this.resetCurrent((this.state & flags.right) ? 7 : 8);
        this.state |= flags.attack;
        this.moveX = 0;
    }
    return;
} else if(this.state & flags.attack){
    this.state = flags.idle; //reset below
}
There is a danger when writing a book on programming of giving the reader the impression that an experienced programmer knows how to write a section of code straight off. It is important to understand that experience helps but that there is often a fair bit of trial and error. Plus, book authors get to go back and re-write clumsy code when it becomes obvious. This book tries to illustrate the steps involved in developing a game program and that often involves revisiting code already written. This has the potential to be mildly exasperating so just imagine how frustrating things would be if this book tracked the debugging process as well. The reader has a hard enough job taking on any new programming ideas while dealing with their inevitable code typos without having to share in the author’s bugs and false starts.
Now the Spider object’s die() method.
Spider.prototype.die = function(){
    if(this.state != flags.die){
        this.state = flags.die;
        this.moveX = 0;
        this.resetCurrent(2);
    }
};
The character will end up killing a spider if in attack mode when colliding. If the character is not in attack mode or is facing the wrong way (there could be more than one spider) then the spider kills the character. There is scope for more sound effects here of course.
When testing this stage, it would probably be a good idea to switch the image file used by the stop objects to one that is entirely transparent in the Level.build() method.
//let p = new Sprite("images/stopper.png",
let p = new Sprite("images/stopperTrans.png",
The spiders will continue to “bump” into the non-visible stops Sprite objects while the character always ignores them.
You might well want to “toggle” between the two image files so that you can check out a given layout and its spider constraints before later hiding the stops for better game play.
We managed the collision detection for the spider objects in the same way as the coins by placing all of the responding code into the character.collision() method. It might be useful to allow other sprites that inherit from Actor to detect the character. This would be easily enabled by adding a new array to the sprites object and adding our character to that array at the end of the makeCharacter() function.
var objects = {
    platforms: [],
    water: [],
    things: [],
    coins: [],
    stops: [],
    spiders: [],
    actors: []
};

    objects.actors[0] = character; // add to buildCharacter()
Assigning an existing object to a variable (or array element) does not make a copy of the object. If you have a variable containing a number and then create another variable and use the assignment operator (=) you can copy a value from one variable to another.
var a = 5;
var b = a;
In the above code, b now also holds the value 5 and that value can be varied without an effect on the content of the variable called a. It is different for objects. Try the following in Snippets (in the Chrome developer tools).
var objA = {x: 4, y: 5};
alert(objA.x);
var objB = objA;
objB.x = 23;
alert(objA.x);
You will see that the variable objB acts as a sort of “pointer” to the original object and that it does not have a unique copy of the object in the same way as happened with the numeric variables. Both the variables objA and objB point to the object that was created in the first line of that code snippet. Neither variable “contains” the object in any meaningful way.
Another interesting approach to balancing the chances of a Spider (or other Actor based hazards) versus our character might be to give the Spider entity warning of an approaching ninja. First add a new variable to the Spider objects:
var Spider = function(x,y){
    Actor.call(this, x, y);
    this.state = 0;
    this.range = 0;
         …
Then create a method that can identify a character sprite on the same platform level as the spider (as long as the spider is looking in the right direction).
Spider.prototype.look = function(){
    let cRect = character.getRect();
    let sRect = this.getRect();
    if(cRect.y + cRect.height === sRect.y + sRect.height){
        if(cRect.x < sRect.x) {
            if (this.moveX < 0){
                this.range = (cRect.x + cRect.width) - sRect.x;
            }
        }else if(this.moveX > 0) {
            this.range = cRect.x - (sRect.x + sRect.width);
        }
    } else {this.range = 0;}
};
The new method could be called from the Spider manageActions() method.
Spider.prototype.manageActions = function(){
    if(this.current === 2 && this.anims[2].frame ===
                             this.anims[2].default){
        this.visible = false; // dead and gone
    } else {
        this.collisionDetect();
        this.look();
        if(this.range){
        }
    }
};
Adding code after “if(this.range){” to increase the spider’s chances in battle perhaps. The range value indicates both distance and direction to an approaching ninja.
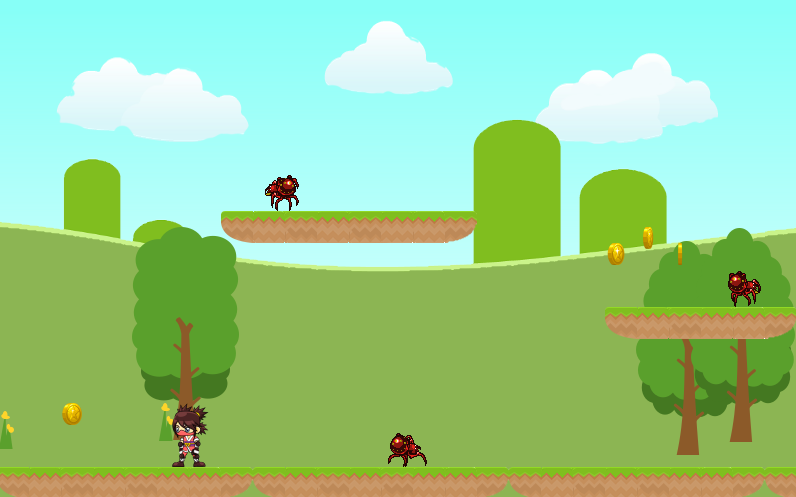
Stage 9
It is probably clear by now that this chapter does not deliver a complete platform game. What it is intended to do, is provide a tool kit of objects and code for building a game that you would find satisfying and fun to play. There has also been some great JavaScript involved that will stand anyone in good stead when they come to structure and manage a program with many active elements.
This final section is about scale and screen real-estate in particular. There is a reason why active platform game characters and platforms are usually small scale. This is not just because that makes the animations easier to draw but also because it allows for more complex platform layouts within the dimensions of the available play area. If you are working with a desktop PC equipped with a wide screen monitor then you have lots of scope. If you want to squeeze the action into the space available on a tablet of phone then there might still be some work to do.
You could break a complex set of platforms down into a sequence of screens and Level objects to move between layouts or you could consider designing a set of platforms that extend beyond the width of the canvas element in the browser window. To try out this final idea, set up some platform elements that extend left and right of the canvas width. Something like these in the Level object:
    sections: [
        new Sect(-8, 1, 3),
        new Sect(0, 1, 3),
        new Sect(8, 1, 3),
        new Sect(16, 1, 3),
        new Sect(19, 6, 2),
        new Sect(7, 9, 3),
        new Sect(24, 1, 3)
    ],
We will also need some values to hold the number of pixels that the platform layout extends beyond the canvas width plus a value to set the point at which the layout can be made to scroll horizontally when the character moves towards the edge of the play area. These are probably best added to the Level object.
    spiders: [
        {x:8, y:9},
        {x: 20, y:6},
        {x:11, y:1}
    ],
    scrollAt: 150,
    leftEdge: 0,
    rightEdge: 0
There is a small problem that needs to be overcome. The platform sprites only know how wide they are after their image file has been loaded and that is likely to occur after the levelBuild() method has completed. There are solutions to this which will be explored later in this book but the simplest one is an array of platform image widths to go along with the platformImages array.
var platformWidths = [96, 128, 192, 256, 96, 192, 96];
We can add a new method to the Level object to calculate changes (where appropriate) to the “edges” of the whole game scene as they extend beyond the <canvas>. This method can then be called by any of the sprite construction loops that might place an item beyond the edges.
Level.calcEdges = function(p){
    if(p.x < 0){
        Level.leftEdge = Math.max(Level.leftEdge, Math.abs(p.x));
    } else {
        let pRight = p.x + platformWidths[this.sections[s].imageIndex];
        if(pRight > canvas.width){
            Level.rightEdge = Math.max(Level.rightEdge,
                                       pRight - canvas.width);
        }
    }
};
That method is called just before adding a new sprite – here is the code addition to the loop that constructs the platforms:
        this.calcEdges(p);
        objects.platforms.push(p);
The code changes will set the new values while creating the platform sprites. All we have to do now is get the platforms to scroll when our character moves towards the edge of the game area. We scroll all of the sprites instead of moving the character.
To manage moving the character OR scrolling the rest of the screen objects right or left we will have to override the Actor.animate() method with a new character.animate() method. [We can also fix the existing bug that allows the character to move out of the play area at the same time.]
character.animate = function(){
    if(this.visible){
        this.anims[this.current].animate(this.x, this.y);
    }
    if(game.state === game.states.running){
        let scrollSet = false;
        let mRect = this.getRect();
        if(Level.rightEdge > 0 && this.moveX > 0){
            scrollSet = this.x + this.moveX  + mRect.width >
            canvas.width - Level.scrollAt;
        } else if(Level.leftEdge > 0 && this.moveX < 0){
            scrollSet = this.x - this.moveX < Level.scrollAt;
        }
        if(scrollSet){
            for (let type in objects){
                let list = objects[type];
                for(let s = 0; s < list.length; s++){
                    list[s].x -= this.moveX; // note sign
                }
            }
            Background.set(this.moveX);
            Level.rightEdge -= this.moveX;
            Level.leftEdge += this.moveX;
        } else {
            this.x += this.moveX;
            if(this.x < 0){
                this.x = 0;  // confined to screen width
            } else if(this.x + mRect.width >= canvas.width){
                this.x = canvas.width - mRect.width;
            }
        }
        this.y += this.moveY;
    }
    this.manageActions();
};
The new method checks to see if the character is within the specified (scrollAt) distance of the edge of the canvas and if there are any off-screen platforms. If so, then the code scrolls all of the screen elements apart from our character right or left in the opposite direction to the character’s travel. Otherwise, the character is moved right or left. To switch back to the standard Actor.animate() method all you have to do is delete or comment out this addition (although you might want to keep the code that stops the character moving off screen).
The background sprites need to move along with the other screen elements but at a different speed.
It would help to change the background movement speeds to a fraction that can be applied to the character speed (which might vary in one of your platform games). So, edit the background object to read:
var Background = {
    sprites: [],
    backSpeed: 0.1,
    bgWidth: 1024,
    midSpeed: 0.45
};
The addBackgrounds() function can be edited to:
function addBackgrounds(){
    let back = new Sprite("images/background.png", -(Level.leftEdge +
                                              Level.scrollAt * 2), 0);
    Background.sprites.push(back);
    back = new Sprite("images/background.png", Background.sprites[0].x +
                                              Background.bgWidth, 0);
    Background.sprites.push(back);
    back = new Sprite("images/altmid.png", Background.sprites[0].x,
                                                  canvas.height - 320);
    Background.sprites.push(back);
    back = new Sprite("images/altmid.png", Background.sprites[1].x,
                                                  canvas.height - 320);
    Background.sprites.push(back);
}
The backgroundsAnimate() method can be reduced to:
Background.animate = function(){
    for(let b = 0; b < this.sprites.length; b++){
        this.sprites[b].animate();
    }
};
Plus a new Backgrounds.set() method can apply movement when called by the character.animate() method.
Background.set = function(xChange){
    let xc = 0;
    for(let b = 0; b < this.sprites.length; b++){
        switch(b){
            case 0:
            case 1:
                xc = xChange * this.backSpeed;
                this.sprites[b].x -= xc;
                break;
            default:
                xc = xChange * this.midSpeed;
                this.sprites[b].x -= xc;
                break;
        }
    }
};
Time to try the code and judge the effect.
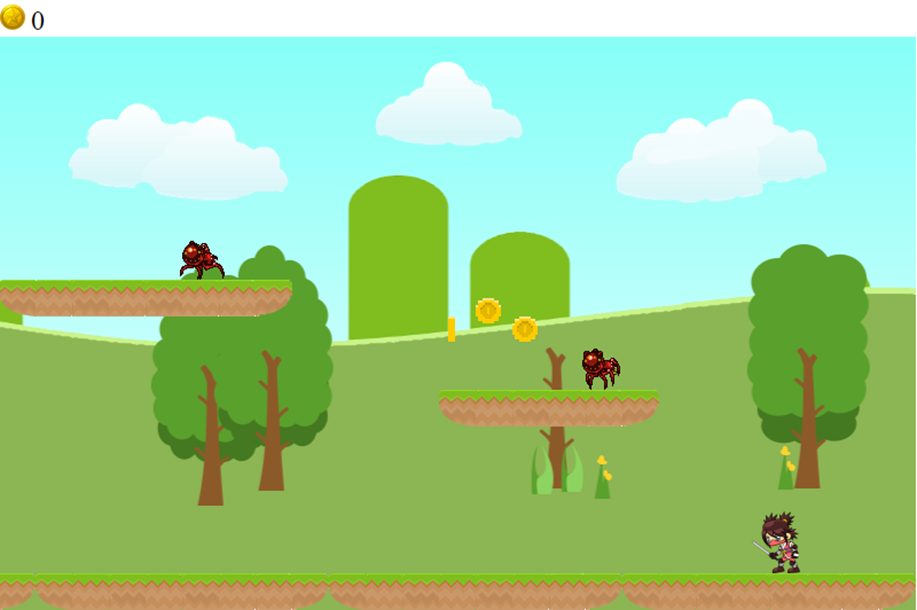
Code downloads for this chapter are available here.